
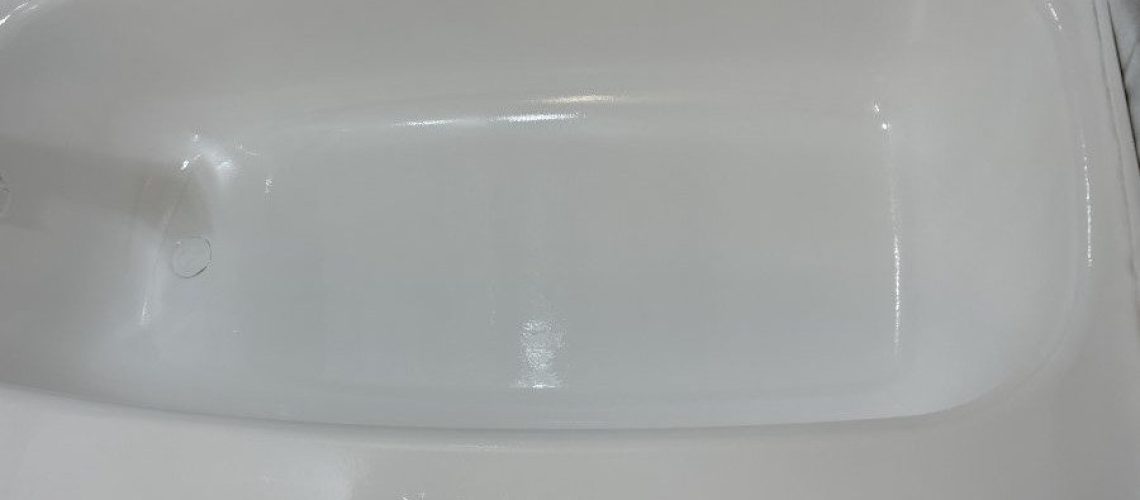

Table of Contents
- Why Antique Clawfoot Tubs Deserve Restoration
- How to Prepare a Bathtub for Refinishing
- The Refinishing Process for Clawfoot Tubs
- Bathtub Reglazing Drying Time and Curing
- Refinished Bathtub Care and Maintenance
- Bathtub Refinishing vs. Replacement: Making the Right Choice
- Common Mistakes to Avoid When Restoring Your Tub
- Frequently Asked Questions
Last Updated: October 8, 2026
Why Antique Clawfoot Tubs Deserve Restoration
Restoring an antique clawfoot tub finish is often cheaper than replacement. A worn or faded tub can look brand new again with the right approach. At Century BathTubs, we’ve helped homeowners in toronto and the GTA save thousands by bringing their vintage fixtures back to life.
The real appeal of these tubs goes beyond nostalgia. Cast iron clawfoot tubs are built to last decades. They’re heavier, more durable, and hold heat better than modern acrylic alternatives. When the finish deteriorates, the tub itself is usually still solid underneath.
Many homeowners assume a damaged tub means a full replacement. That’s not true. A professional refinishing job can extend the life of your fixture by years. The process is fast, and the results are durable when done right.
How to Prepare a Bathtub for Refinishing
Preparation determines whether your refinished bathtub will last or fail early. Rushing this step is the biggest mistake we see. A proper restore antique clawfoot tub finish job starts with thorough preparation.
Cleaning and Inspection
Start by draining the tub completely. Remove any standing water or debris. Then clean the entire surface thoroughly.
Use a non-abrasive cleaner and a soft cloth. Avoid steel wool or harsh scouring pads. These can scratch the existing finish and create more damage to repair.
Inspect the tub carefully for cracks, chips, or rust spots:
- Look at corners and edges where damage often starts
- Check under the rim for hidden deterioration
- Run your hand along the interior to feel for rough patches
- Note any areas where the coating is peeling or bubbling
Deep cracks in cast iron are common in older tubs. Small surface cracks can be patched. Severe structural cracks may require professional assessment before refinishing proceeds.
Surface Repair and Patching
Once you’ve identified damage, repair it before refinishing. This prevents water from seeping under the new coating later.
For small chips or cracks, use a patching compound. These products fill gaps and cure hard. Apply them slightly overfilled, then sand smooth once dry.
For rust spots, remove loose rust with a wire brush. Then apply a rust converter to stop corrosion. This prevents rust from spreading under the new finish.
The goal is a smooth, even surface. Any bumps or rough spots will show through the final coating. Sand the entire tub lightly with fine-grit sandpaper to improve adhesion for the new finish.
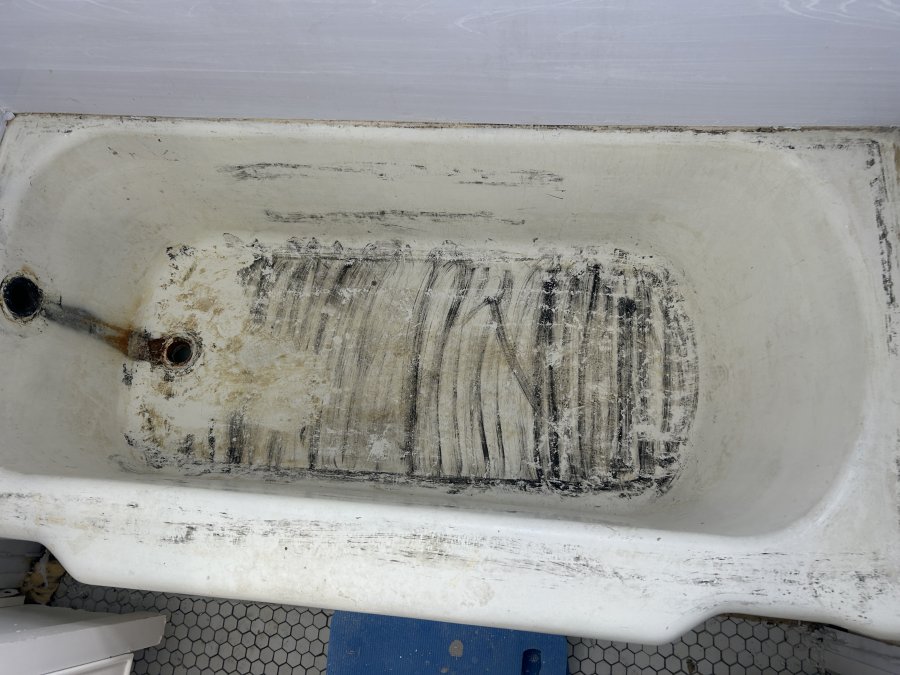
The Refinishing Process for Clawfoot Tubs
Professional refinishing uses a multi-step coating system. The process transforms a dull, stained tub into a glossy, fresh surface. Understanding each step helps you understand why proper application matters.
Masking and Protection
Before any coating touches the tub, protect everything around it. Mask off the surrounding walls, floor, and fixtures. Use plastic sheeting and painter’s tape to create a contained work area.
This step prevents overspray from reaching areas you don’t want coated. It also protects your bathroom during the curing process, when the coating is still soft and vulnerable.
Proper masking takes time. A thorough job can take 2-3 hours. Skipping this step leads to costly cleanup and potential damage to tiles, fixtures, and flooring.
Coating Application
The actual coating application is where professional equipment makes a difference. Professional refinishing often uses a spray application system, which helps ensure even coverage and a smooth, consistent finish.
A primer coat goes on first. This creates adhesion between the old surface and the new topcoat. The primer cures for a set time before the topcoat is applied.
The topcoat is the visible finish. Century BathTubs applies our durable EP-ACRYLIC coating system, which bonds to the existing surface and creates a hard, glossy finish.
Multiple thin coats cure evenly and resist peeling. Thick coats are more prone to bubbling and poor adhesion.
Bathtub Reglazing Drying Time and Curing
Drying time and curing time are not the same. A bathtub reglazing project requires patience. The coating must cure fully before the tub is used.
Initial drying happens in a few hours. The surface feels dry to the touch, but the coating is still soft underneath.
Full curing takes longer. Most coatings need 24-48 hours before light use. Heavy use or water contact should wait 72 hours or more.
Temperature and humidity affect curing speed.
During curing, keep the bathroom well-ventilated. Open windows if possible.
Do not use the tub until the coating is fully cured. Water contact too early can cause the coating to soften, blister, or peel. This is why timing matters so much.
Refinished Bathtub Care and Maintenance
A properly refinished bathtub is durable, but it’s not indestructible. How you care for it determines how long the finish lasts.
Clean the tub regularly with a soft cloth and mild soap. Avoid abrasive scrubbers or harsh chemicals. These wear down the coating over time.
Use a non-abrasive cleaner. Vinegar and baking soda work well for gentle cleaning. Bleach-based cleaners are too harsh and should be avoided.
Prevent staining by wiping up spills quickly. Hard water deposits can build up and dull the finish. A squeegee after each use helps prevent water spots.
Avoid dropping heavy objects in the tub. The coating is tough, but sharp impacts can crack or chip it. Use a bath mat for safety and to protect the finish.
For refinished bathtub care, consistency matters more than intensity. Light, regular maintenance beats occasional aggressive scrubbing. This keeps the finish looking new for years.
Bathtub Refinishing vs. Replacement: Making the Right Choice
When your tub is damaged, you face a choice: refinish or replace. Both options have trade-offs.
Refinishing costs less than replacement. It preserves the original fixture. The process is fast.
Replacement gives you a brand-new tub. You can choose a different style or size.
But replacement means demolition, disposal, and installation. That takes longer and costs more. You lose the character of an original antique clawfoot tub.
For most homeowners in toronto, refinishing makes sense. The existing tub is structurally sound. The finish just needs restoration. A restore antique clawfoot tub finish job costs a fraction of replacement.
Replacement may be considered if the tub has severe structural damage that is beyond repair.
Ask yourself: Is the tub itself in good shape? If yes, refinishing is a great option. If the structure is severely damaged, replacement may be necessary.
Common Mistakes to Avoid When Restoring Your Tub
Most refinishing failures happen because of preparation shortcuts. Skipping steps or rushing the process leads to peeling, chipping, or poor adhesion.
Do not skip the cleaning step. Dirt, soap scum, and mold prevent the coating from bonding. The tub must be spotless before any primer is applied.
Do not refinish over existing flaking coating. Old paint or finish that’s already peeling will fail again. Remove all loose material first.
Do not use the tub too soon. Impatience is costly. Using the tub before full curing can ruin the finish. Wait the full recommended time.
Do not apply thick coats. Thick applications bubble, crack, or peel. Multiple thin coats cure more evenly.
Do not neglect repairs. Small cracks and rust spots seem minor. But water seeps under the new coating and causes failure underneath. Fix damage before refinishing.
Do not use harsh cleaners on the finished tub. Bleach and abrasive scrubbers damage the coating. Gentle care extends the life of your refinished surface.
Restoring an antique clawfoot tub finish is an investment in your home’s character and function. A worn tub doesn’t have to become landfill. Professional refinishing brings it back to life at a fraction of replacement cost.
Century BathTubs has been restoring tubs in toronto and the GTA since 1995. Our licensed, insured technicians use a durable EP-ACRYLIC coating system backed by a three-year hassle-free guarantee. We handle everything from inspection to final curing.
Ready to restore your antique clawfoot tub? Contact Century BathTubs for a free inquiry and learn how much you can save.
Frequently Asked Questions
Can you restore the finish on an antique clawfoot tub?
Yes, antique clawfoot tubs can be restored through professional refinishing. The process involves thorough cleaning, minor repairs to cracks or chips, and application of a durable coating system. This approach restores the tub’s appearance and functionality without removing it, preserving its original character and value.
How long does bathtub reglazing take to dry?
Bathtub reglazing requires time for drying and full curing. During this period, avoid using the tub or exposing it to moisture. Professional refinishing services provide specific drying time guidance based on the coating system used.
Is it better to refinish or replace an antique clawfoot tub?
Refinishing is often the better choice for antique clawfoot tubs because it preserves the original fixture, costs significantly less than replacement, and is fast. Replacement involves removal, disposal, and new installation. Refinishing extends your tub’s life while maintaining its historic appeal and authenticity.
How do you care for a refinished clawfoot tub?
Care for a refinished tub by cleaning gently with non-abrasive cleaners, avoiding harsh chemicals and scouring pads, and wiping dry after use to prevent water spots. Use bath mats to reduce wear on the surface, and address any chips or damage promptly. Proper maintenance protects your refinished surface and helps maintain its quality, backed by our three-year hassle-free guarantee.