

Table of Contents
- What You’ll Need for Repairing Chipped Bathtub Enamel
- Step-by-Step: How to Repair a Chipped Bathtub Yourself
- How to Choose the Best Bathtub Repair Kit in Canada
- How to Remove Stains from Tub Before You Repair
- Bathtub Refinishing Toronto Cost: DIY vs Professional
- Common Mistakes to Avoid with DIY Bathtub Chip Repair
- When to Call a Professional for Repairs in Toronto
- Frequently Asked Questions
Last Updated: September 27, 2026
What You’ll Need for Repairing Chipped Bathtub Enamel
Repairing chipped bathtub enamel DIY is a practical fix for small chips, cracks, and worn spots on a tub surface. It costs far less than replacement, and most homeowners in Toronto can finish the job in an afternoon.
A chipped tub is more than an eyesore. Once the enamel layer breaks, water reaches the metal or fiberglass underneath. That speeds up rust and makes the chip grow.
At Century BathTubs, we’ve repaired and refinished tubs and shower tiles across Toronto since 1995. Small chips are a common call, and many of them are fixable without a full replacement.
Here’s what to gather before you start:
- Bathtub repair kit with epoxy or acrylic filler made for tubs
- Rubbing alcohol or a mild cleaner for prep
- Fine-grit wet sandpaper (400 to 600 grit)
- Buffing compound and a soft cloth
- Painter’s tape to protect the surrounding area
- Rubber gloves and a mask for safety
- A small putty knife or applicator
Most of these items come in a single kit. You can find them at any hardware store in the GTA.
Buy a kit with a color-matching option. A white patch on an off-white tub stands out more than the original chip did.
Step-by-Step: How to Repair a Chipped Bathtub Yourself
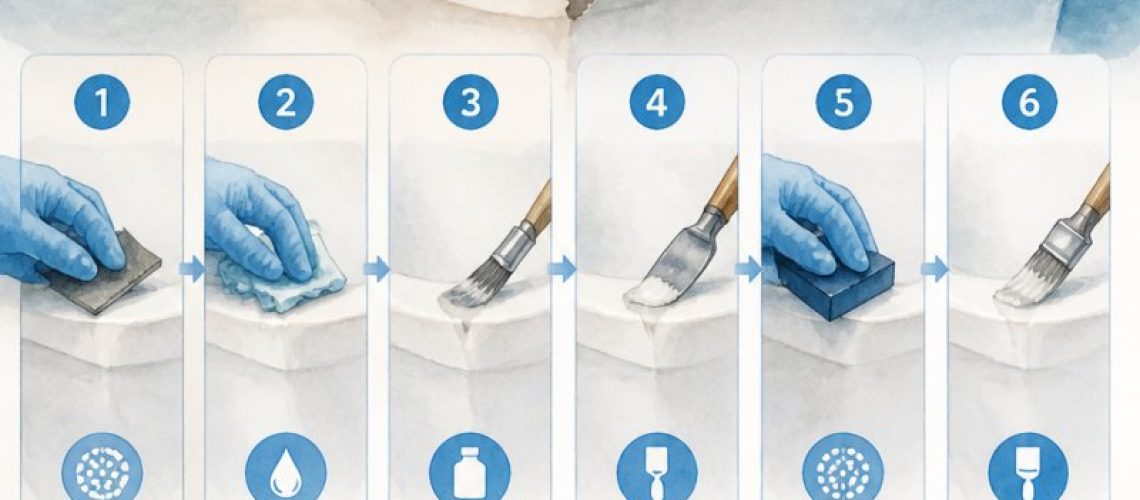
The full repair follows four stages: prepare, fill, cure, and blend. Each stage matters, and rushing any one of them shortens how long the fix lasts.
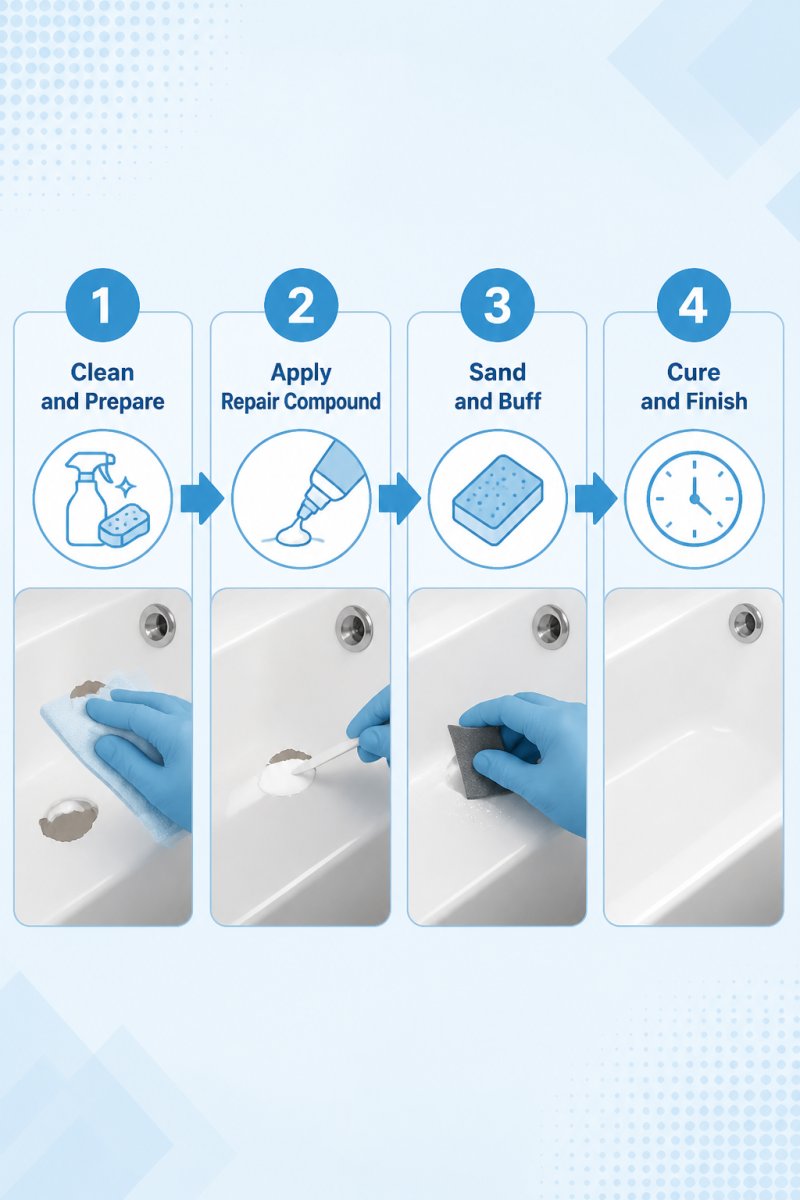
Step 1: Clean and Prepare the Damaged Area
A clean surface is the difference between a repair that holds and one that peels. Start by wiping the chip and the area around it with rubbing alcohol.
Remove any loose enamel flakes with the edge of a putty knife. If you see rust, sand it down to bare metal first.
Then dry the area completely. Any moisture left behind weakens the bond. Tape off the edges around the chip so the filler stays where you want it.
Step 2: Apply the Repair Compound and Let It Cure
Mix the epoxy or acrylic filler exactly as the kit instructs. Apply it in thin layers with your applicator.
Build up the layers until the patch sits slightly above the tub surface. This matters because the filler shrinks as it dries.
Let each layer cure before adding the next. Most kits need several hours between coats, and full curing can take a day.
Skipping the cure time is the most common mistake. Filler that hasn’t fully hardened will crack the moment someone stands in the tub.
Step 3: Sand, Buff, and Blend the Repair
Once the patch is fully cured, wet the fine-grit sandpaper and sand the repair smooth. Work gently in small circles.
Keep the surface level with the rest of the tub. Run your hand over it to check for bumps.
Then apply buffing compound and polish the area with a soft cloth. This blends the patch into the surrounding enamel so it’s hard to spot.
How to Choose the Best Bathtub Repair Kit in Canada
The best bathtub repair kit in Canada is one made for your tub’s material, since acrylic, fiberglass, and cast iron each need a different filler. Check the label before you buy.
Look for kits that include a color-match system. A close match hides the repair; a mismatched patch draws the eye right to it.
Here’s how the main options compare:
| Kit Type | Best For | Cure Time | Skill Level |
|---|---|---|---|
| Epoxy filler | Deep chips, cracks | 24 hours | Beginner |
| Acrylic compound | Surface scratches | 2-4 hours | Beginner |
| Porcelain touch-up | Cast iron tubs | 12-24 hours | Intermediate |
| Full refinishing kit | Worn or stained tubs | 48 hours | Advanced |
For a single small chip, an epoxy kit is usually enough. For a tub with several worn spots, a full refinishing kit makes more sense.
Homeowners with one or two small chips who want a quick, low-cost fix without special tools.
How to Remove Stains from Tub Before You Repair
Stains around a chip hide the damage and make the repair harder to blend. Clean the whole tub before you start filling.
For rust stains, use a cleaner made for enamel. For soap scum, a mix of baking soda and water works well.
Skip harsh abrasives like steel wool. They scratch the enamel and create new places for grime to collect.
Rinse the tub fully and let it dry. A clean, dry surface gives the repair compound the best grip.
Bathtub Refinishing Toronto Cost: DIY vs Professional
The bathtub refinishing Toronto cost question comes down to scope. A small DIY chip repair can be a low-cost option, while a full professional refinish is a larger investment but covers the whole tub.
DIY makes sense when the damage is small and the surface is otherwise in good shape. You handle one chip, and you’re done.
Professional refinishing makes sense when the tub is worn, stained, or covered in small cracks. A full reglaze restores the entire surface instead of patching one spot.
Pricing for professional work depends on the tub size, condition, and finish you choose. Century BathTubs provides free quotes so you know the cost before you commit.
Common Mistakes to Avoid with DIY Bathtub Chip Repair
Most failed repairs trace back to a handful of avoidable errors. Here are the ones we see most often:
- Skipping prep. Filler won’t stick to a dirty or damp surface.
- Applying one thick coat. Thin layers cure better and hold longer.
- Sanding too soon. Soft filler tears instead of smoothing.
- Ignoring rust. Rust under a patch keeps spreading until it lifts the repair.
- Using the wrong filler. Porcelain and acrylic tubs need different compounds.
A common mistake is treating a deep crack like a surface chip. Deep damage often needs a professional repair, not a patch.
Prep and cure time decide how long a DIY repair lasts. Rushing either one is why most patches fail within months.
When to Call a Professional for Repairs in Toronto
Some damage is beyond a DIY kit. Call a professional when the chip is deep, the tub is cracked through, or rust has spread under the surface.
Signs you need expert help:
- Cracks that run through the tub body
- Rust that keeps coming back after repair
- Multiple chips across the whole surface
- A tub that flexes or feels soft underfoot
Century BathTubs uses a durable EP-ACRYLIC coating system for these cases. Our licensed and insured technicians have served Toronto and the GTA since 1995, and we do any kind of bathtubs and shower tiles refinishing. Every job comes with a three-year hassle-free guarantee.
If you’re searching for bathtub refinishing near me in Toronto, a quick call tells you whether a repair or a full refinish is the right move.
Frequently Asked Questions
Is it worth repairing a chipped bathtub yourself?
For small chips and minor damage, DIY repair can be worthwhile and cost-effective. However, if the chip is deep, the tub is old, or you want a flawless finish, professional refinishing may be better. DIY repairs using a bathtub repair kit can last several years if done properly, but they may not match the durability of professional reglazing. Consider the size of the damage and your comfort with DIY before deciding.
What is the best bathtub repair kit available in Canada?
The best bathtub repair kit in Canada depends on your tub material and the type of damage. Look for kits that include an epoxy or acrylic compound, sandpaper, and a mixing tool. Some kits are specifically designed for porcelain, while others work on fiberglass and acrylic. Read reviews and choose a kit that matches your tub’s surface. For deep chips, consider a kit with a filler that can be sanded to a smooth finish.
How long does a DIY bathtub chip repair last?
A properly applied DIY repair can last anywhere from one to five years, depending on the product used, the size of the chip, and how well you prepare the surface. Epoxy-based fillers tend to be more durable than those made from enamel paint alone. To extend the life of your repair, avoid harsh cleaners and ensure the area is completely dry before applying the compound. If the repair starts to peel or discolor, it can be redone.
Can you fix a deep chip in a porcelain bathtub?
Yes, deep chips in porcelain can be repaired, but it requires a filler that can build up the missing material. Clean the area thoroughly, apply a porcelain repair compound in thin layers, and sand between coats until smooth. For very deep chips that expose the metal underneath, you may need a rust inhibitor before filling. If the chip is larger than a coin or the tub is structurally compromised, professional refinishing is recommended.
A chipped tub won’t fix itself, and small damage grows fast once water gets underneath. If your repair needs more than a patch, Century BathTubs can help. We offer professional refinishing with our EP-ACRYLIC coating system, licensed and insured technicians, and a three-year hassle-free guarantee across Toronto and the GTA. Get started with Century BathTubs and restore your tub without the cost of replacement.