

Table of Contents
- What You’ll Need to Fix Bathtub Chips
- How to Repair a Chipped Acrylic Bathtub
- Bathtub Chip Repair Curing Time and Drying
- How to Fix Bathtub Chips in Porcelain and Enamel
- Common Mistakes to Avoid When Repairing Bathtub Chips
- Professional Bathtub Refinishing in Toronto: When to Call an Expert
- Conclusion
- Frequently Asked Questions
Last Updated: October 6, 2026
What You’ll Need to Fix Bathtub Chips
Repairing bathtub chips yourself requires the right tools and materials. Gather these items before you start:
Essential supplies:
- Sandpaper (120-grit, 220-grit, and 400-grit)
- Bathtub repair compound or epoxy putty
- Cleaning supplies (degreaser, cloth, brush)
- Protective gloves and safety glasses
- Putty knife or scraper
- Small container for mixing
- Caulk gun (if using caulk-style repair compound)
- Primer and touch-up paint or sealant
The exact materials depend on your bathtub material. Acrylic tubs need different compounds than porcelain or enamel. Most repair kits include everything you need in one package, making the process straightforward.
Having the right supplies on hand prevents delays. Many homeowners in the Toronto area find that investing in quality materials upfront saves frustration later.
How to Repair a Chipped Acrylic Bathtub
Acrylic is the most common bathtub material and responds well to DIY repairs. The process involves four main steps: cleaning, sanding, applying repair compound, and curing.
Step 1: Clean and Dry the Damaged Area
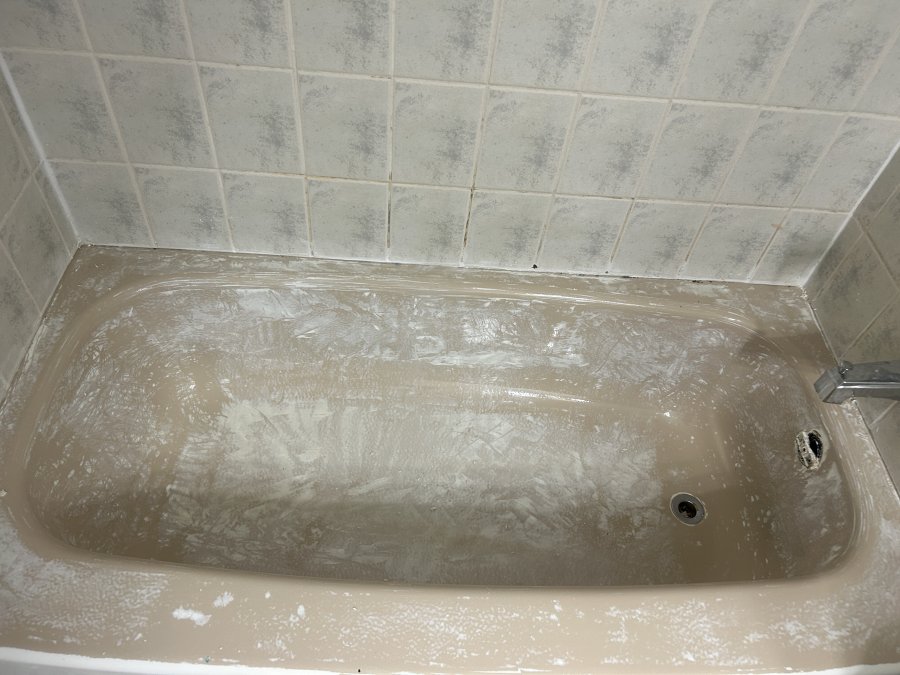
Start by cleaning the chipped area thoroughly. Remove any loose debris, dirt, or soap buildup around the chip. Use a degreaser to clean the surface, then dry it completely with a clean cloth.
A dry surface is essential. Moisture prevents the repair compound from bonding properly. If your bathroom is humid, use a hair dryer on low heat to dry the area completely.
Pay special attention to the edges of the chip. Wipe away any loose acrylic particles. A clean surface ensures the repair compound adheres evenly.
Step 2: Sand the Chip Smooth
Use 120-grit sandpaper to smooth the edges of the chip. Sand in circular motions, working outward from the damaged area. This creates a slightly rougher surface for the repair compound to grip.
After the initial sanding, switch to 220-grit sandpaper. Sand again until the edges are smooth and blended with the surrounding surface. Wipe away all dust with a damp cloth, then dry completely.
The goal is to remove sharp edges and create a surface the repair compound can bond to securely. Proper sanding is one of the most important steps in the repair process.
Step 3: Apply the Repair Compound
Follow the instructions on your repair compound carefully. Most compounds require mixing before application. Mix only what you need, as some compounds set quickly.
Apply the compound into the chip using a putty knife. Press it firmly into the damaged area, overfilling slightly. Smooth the surface with the putty knife, working the compound level with the surrounding bathtub surface.
Work quickly but carefully. Smooth strokes create a better finish than multiple passes. If the compound begins to set before you finish, you may need to sand it down and reapply.
Step 4: Shape and Smooth the Repair
Once the compound is applied, allow it to cure according to the manufacturer’s instructions. Most compounds require 24 hours of curing time before sanding.
After curing, sand the repair smooth using 400-grit sandpaper. Sand gently to avoid disturbing the repair. The goal is to blend the repair seamlessly with the surrounding surface.
Wipe away all dust, then apply primer if recommended by the compound manufacturer. Once the primer dries, apply touch-up paint or sealant to match your bathtub finish.
Bathtub Chip Repair Curing Time and Drying
The curing time for bathtub repairs varies by product. Most epoxy compounds and acrylic repair putties require 24 hours to cure fully. Some fast-setting compounds may cure in as little as 4-6 hours, while others need up to 48 hours.
Check your specific product’s instructions for exact curing times. Temperature and humidity affect curing speed. Cooler, drier conditions may extend curing time, while warmer conditions may accelerate it.
Do not use the bathtub during curing. Even if the surface feels dry, the repair compound may not have fully hardened. Using the tub prematurely can damage the repair and waste your effort.
Plan your repair for a time when you can avoid using the bathtub for at least 24 hours. This gives the compound adequate time to set completely and ensures the best results.
After curing is complete, the repaired area should be waterproof and durable. For added protection, apply a clear sealant over the repair once it has fully cured.
How to Fix Bathtub Chips in Porcelain and Enamel
Porcelain and enamel bathtubs require different repair approaches than acrylic. These materials are harder and more brittle, so the repair process differs slightly.
Start with the same cleaning and sanding steps as acrylic repairs. Use 120-grit sandpaper to roughen the damaged area, then switch to 220-grit for a smoother finish.
For porcelain and enamel, use an epoxy-based repair compound specifically designed for these materials. Acrylic compounds may not bond properly to porcelain or enamel surfaces.
Apply the epoxy compound following the manufacturer’s instructions. These compounds often require longer curing times than acrylic repairs, sometimes 48 hours or more.
Sand the cured repair with 400-grit sandpaper, then apply a porcelain or enamel-specific sealant. This creates a waterproof barrier and protects the repair from moisture damage.
Porcelain and enamel chips can expose the underlying material, which may be cast iron or steel. If the chip is deep and exposes the base material, rust may develop. Address these repairs promptly to prevent further damage.
Common Mistakes to Avoid When Repairing Bathtub Chips
Many homeowners make preventable errors when fixing bathtub chips. Learning from these mistakes saves time and improves results.
Skipping the cleaning step. A dirty surface prevents proper bonding. Always clean and degrease the area before applying repair compound.
Using the wrong repair material. Acrylic compounds don’t work on porcelain, and vice versa. Match your repair compound to your bathtub material.
Insufficient sanding. Smooth edges and a roughened surface are essential for adhesion. Don’t skip this step or rush through it.
Applying compound too thin. Thin applications crack as they cure. Fill the chip completely, slightly overfilling if needed.
Not waiting for full curing. Using the bathtub before the compound fully hardens ruins the repair. Follow curing time guidelines precisely.
Ignoring deep chips. Small surface chips are easy to repair. Deep chips that expose underlying material may require professional attention.
Applying sealant too early. Wait for the repair compound to cure completely before sealing. Premature sealing traps moisture and weakens the repair.
Professional Bathtub Refinishing in Toronto: When to Call an Expert
Some bathtub chips are best left to professionals. Deep chips, large damaged areas, or multiple chips may exceed DIY repair capabilities. This is where professional bathtub refinishing becomes the smarter choice.
At Century BathTubs, we handle chips and damage that DIY methods can’t fix. Our team uses durable EP-ACRYLIC coating systems to restore worn or faded bathtub surfaces. We’ve been serving Toronto and the GTA since 1995, helping homeowners and property managers save thousands of dollars by extending the life of their fixtures.
Professional refinishing offers several advantages over DIY repair. Our licensed and insured technicians apply coatings that last longer than patch repairs. The entire surface is refinished, not just the damaged area, creating a uniform appearance.
Consider professional refinishing if:
- The chip is larger than a quarter
- Multiple chips are present across the tub
- The bathtub is old and showing widespread wear
- You want a guaranteed result with a warranty
- The damage exposes the underlying material
- You need the work completed quickly
Our three-year hassle-free guarantee gives you peace of mind. If the coating chips or peels within three years, we address it at no additional cost.
Property managers, landlords, and homeowners in Toronto who need reliable, long-lasting bathtub restoration without the hassle of DIY repairs or full replacement costs.
Conclusion
Small bathtub chips don’t require replacement. With the right materials and careful attention to each step, you can repair minor damage yourself. The process takes patience, but the results are worth the effort.
For larger chips, deep damage, or bathtubs showing widespread wear, professional refinishing is the better choice. Century BathTubs provides fast, durable bathtub restoration across Toronto and the GTA. Our EP-ACRYLIC coating system protects your tub for years while protecting against lead in older fixtures. Get started with a free inquiry today and discover how our professional approach saves you money compared to replacement.
Frequently Asked Questions
How do you fix a chip in a bathtub step by step?
Start by cleaning the chipped area with soap and water, then dry completely. Sand the chip and surrounding surface with fine-grit sandpaper to smooth rough edges. Apply a bathtub repair compound or epoxy filler into the chip, overfilling slightly. Once partially set, sand smooth and apply a protective topcoat. Allow full curing time (typically 24-48 hours) before using the tub. Small surface chips respond well to DIY repair, but deep cracks or large damage may require professional refinishing.
Can you repair a chipped acrylic bathtub without professional help?
Yes, minor chips in acrylic tubs can be repaired with a bathtub chip repair kit containing epoxy filler and sandpaper. However, success depends on chip depth and location. Surface chips less than 1 centimetre across typically repair well with DIY kits. Deeper damage, chips near drain areas, or multiple chips across the tub benefit from professional refinishing. A professional can assess whether your acrylic bathtub repair will hold long-term or if refinishing is more cost-effective.
How long does bathtub chip repair take to cure?
Most bathtub chip repair compounds require 24-48 hours of full curing before the tub is safe to use. Some fast-setting epoxies cure in 12-24 hours, but manufacturer instructions vary. Temperature and humidity affect curing time; cooler or damp conditions extend drying. Do not expose the repair to water or moisture during curing. Once fully cured, the repair should withstand normal bathing, though high-impact use may compromise the seal over time.
When should you call a professional to repair a bathtub chip in Toronto?
Contact a professional refinishing service if chips are deep (over 2 centimetres), numerous, near plumbing fixtures, or if the tub surface is worn or faded. Professional refinishing applies a durable coating system that protects the entire tub and typically includes a warranty. For older cast iron or porcelain tubs, professional assessment prevents water damage beneath the surface. Licensed refinishers in Toronto can evaluate whether repair kits or full refinishing best extends your tub’s life.