

Table of Contents
- Why Paint Selection Matters for Clawfoot Tub Exteriors
- Best Paint for Cast Iron Tub Exterior
- How to Paint a Clawfoot Tub Exterior: Preparation and Application
- How Long Does Bathtub Paint Take to Cure
- Bathtub Refinishing Safety for Families
- DIY vs. Professional Refinishing: What Makes the Difference
- Frequently Asked Questions
Last Updated: October 10, 2026
Why Paint Selection Matters for Clawfoot Tub Exteriors
Choosing the right paint for your clawfoot tub exterior determines how long your refinishing lasts and how well it protects the underlying cast iron. A poor paint choice can chip, peel, or fail within months. The right one keeps your tub looking restored for years.
At Century BathTubs, we’ve worked with clawfoot tubs across Toronto and the GTA since 1995. We know that the paint for clawfoot tub exterior isn’t just about color, it’s about adhesion, durability, and resistance to moisture and temperature swings. Your bathroom environment is harsh. Water splashes, humidity fluctuates, and cast iron expands and contracts. Standard interior paints fail fast in these conditions.
This guide walks you through the best paint options, how to prepare and apply them, and why professional refinishing often outperforms DIY attempts. Whether you’re restoring a family heirloom or flipping a property, understanding these coatings matters.
Best Paint for Cast Iron Tub Exterior
The paint for clawfoot tub exterior falls into three main categories, each with distinct strengths and limitations. Epoxy-based coatings dominate professional refinishing. Polyurethane finishes offer excellent flexibility. Acrylic latex paints provide easier cleanup but less durability.
Epoxy-Based Coatings
Epoxy is the gold standard for cast iron tub refinishing. It bonds chemically to metal, creating a hard, waterproof shell that resists chipping and peeling far better than other options.
Epoxy coatings work by curing through a chemical reaction rather than simple evaporation. Two components, resin and hardener, mix just before application. Once applied, they harden into a plastic-like finish. This chemistry means epoxy forms an almost permanent bond with cast iron.
The best paint for clawfoot tub exterior in professional settings is epoxy because it handles moisture brilliantly. Bathrooms in Toronto experience seasonal humidity swings. Epoxy doesn’t absorb water the way latex does. It also resists temperature changes without cracking.
Application demands precision. Epoxy has a limited pot life, usually 30 minutes to 2 hours depending on the product. Once mixed, you must apply it quickly. Brushstrokes must be smooth and deliberate. Any hesitation leaves visible marks.
The finish is extremely durable. Properly applied epoxy can last 10+ years on a tub exterior with normal use. It’s also harder than other coatings, so it resists scratches and impacts better.
Epoxy-based coatings are the most durable option for clawfoot tub exteriors because they chemically bond to cast iron and resist water penetration far better than latex or polyurethane alternatives.
Polyurethane Finishes
Polyurethane occupies the middle ground between epoxy and latex. It offers better flexibility than epoxy, which matters because cast iron moves slightly with temperature changes.
Unlike epoxy, polyurethane doesn’t require two-part mixing. Many polyurethane products are single-component, meaning you open the can and apply. This simplicity appeals to DIY refinishers, though it comes with trade-offs.
Polyurethane’s flexibility prevents the cracking that can occur when rigid epoxy coats expand and contract with the tub. In older homes or areas with extreme seasonal shifts, this matters. However, polyurethane doesn’t bond as aggressively to metal as epoxy does. It relies more on surface adhesion than chemical bonding.
The paint for clawfoot tub exterior made with polyurethane typically lasts 5-8 years with regular use. That’s respectable but shorter than epoxy. Water resistance is good but not exceptional.
Application is easier than epoxy. Pot life isn’t a concern with single-component products. Cleanup often requires mineral spirits rather than specialized solvents.
:::pro tip
Polyurethane works best on tubs that move slightly or have been previously painted, since its flexibility accommodates minor substrate shifts better than rigid epoxy.
Acrylic Latex Paints
Acrylic latex paints are the least durable option for this application, though they remain popular for DIY projects because they’re affordable and easy to apply.
Latex paints dry by water evaporation. They’re water-based, so cleanup is simple, just soap and water. They emit fewer fumes than epoxy or polyurethane, making them safer for home use without ventilation equipment.
The downside is clear: acrylic latex absorbs water. Bathrooms are wet environments. Over time, moisture seeps behind the paint, causing it to bubble and peel. The paint for clawfoot tub exterior made from latex typically lasts 2-4 years before showing visible wear.
Latex also doesn’t bond as strongly to glossy cast iron surfaces. Proper surface prep becomes even more critical. Even then, adhesion remains weaker than epoxy or polyurethane.
Some manufacturers now offer “bathroom-grade” latex paints with added mildew resistance and water repellency. These perform better than standard latex but still underperform compared to epoxy or polyurethane.
Use latex only if budget is the primary concern or if you’re willing to refinish every few years.
How to Paint a Clawfoot Tub Exterior: Preparation and Application
The difference between a paint job that lasts and one that fails within months comes down to preparation. Most DIY failures happen because surface prep was rushed.
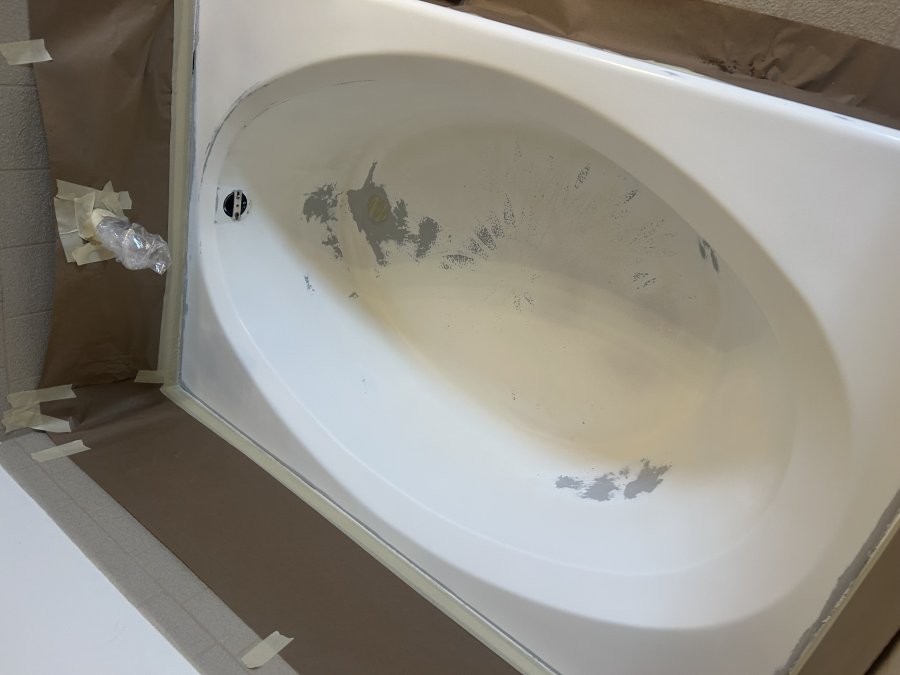
Surface Preparation Steps
Start by cleaning the tub thoroughly. Use a degreaser to remove soap scum, hard water deposits, and any residue. Wipe it down completely and let it dry.
Next, address rust or corrosion. If the tub has surface rust, use a wire brush or fine steel wool to remove it. For deeper rust, a rust converter product can help. The goal is bare, clean metal.
Sand the entire exterior surface. Use 120-150 grit sandpaper to dull the gloss. Cast iron tubs often have a shiny finish that repels paint. Sanding creates tooth, microscopic roughness that helps paint grip.
After sanding, wipe the entire surface with a tack cloth to remove dust. This step is easy to skip but critical. Dust particles trapped under paint create weak spots.
If the tub has been previously painted, check for loose or peeling paint. Scrape away any areas that aren’t firmly adhered. Sand over the edges where old paint meets bare metal to blend them.
For epoxy application, some professionals use a primer designed for metal. A good metal primer improves adhesion significantly. For polyurethane or latex, a primer is often built into the paint formulation, though a separate primer still helps.
Skipping surface prep is the #1 reason DIY tub painting fails. Paint won’t adhere to dirty, glossy, or rusty surfaces. A new coat will bubble and peel within months, wasting materials and effort.
Priming and Paint Application
Once the surface is clean and sanded, apply primer if you’re using a separate product. Use a brush or roller designed for the coating type. Thin, even coats work better than one thick coat.
For epoxy, follow the manufacturer’s instructions carefully. Mix the two components in the exact ratio specified. Stir thoroughly but avoid creating air bubbles. Let the mixed epoxy sit for a few minutes before applying, this allows trapped air to rise and escape.
Apply epoxy with a quality brush in long, smooth strokes. Work in sections. Don’t overbrush, going back over wet epoxy creates streaks. Maintain a wet edge to avoid lap marks.
Polyurethane and latex apply similarly. Use steady, deliberate strokes. Avoid thick applications. Two thin coats outperform one thick coat every time.
Allow proper drying time between coats. Epoxy often requires 24 hours. Polyurethane typically needs 4-8 hours. Latex dries faster, usually 2-4 hours, but full hardness takes longer.
Apply at least two coats. Three coats provide extra protection, especially on high-wear areas like the rim.
How Long Does Bathtub Paint Take to Cure
Curing is different from drying. A coat may feel dry to the touch within hours, but it hasn’t fully hardened.
Epoxy typically requires 24-48 hours to cure fully. During this time, the chemical reaction continues. The finish hardens progressively. Don’t use the tub during this window. Water contact disrupts the curing process.
Polyurethane cures in 3-7 days depending on humidity and temperature. Cooler, drier conditions slow curing. Warm, humid conditions speed it up.
Latex cures fastest, usually 5-10 days, but remains softer than epoxy or polyurethane even after full cure.
Professional refinishers in Toronto typically recommend waiting a full week before using a refinished tub, regardless of the coating type. This ensures complete hardness and water resistance.
Bathtub Refinishing Safety for Families
Refinishing a clawfoot tub involves chemicals that require respect. Proper safety precautions protect your family and yourself.
Ventilation is essential. Open windows and use exhaust fans. Epoxy and polyurethane emit fumes during application and curing. These fumes can cause headaches, dizziness, or respiratory irritation in poorly ventilated spaces.
Wear personal protective equipment. Gloves protect your skin from chemical burns. Safety glasses shield your eyes from splashes. A respirator rated for organic vapors is wise when applying epoxy or polyurethane, especially in enclosed bathrooms.
Keep children and pets away during application and for 24-48 hours after. The wet coating is toxic if ingested. Fumes can irritate young lungs more severely than adult lungs.
If anyone in your household has respiratory conditions, asthma, or chemical sensitivities, consider hiring a professional. The health risk may outweigh the cost savings of DIY.
Old cast iron tubs sometimes contain lead in the glaze. If your tub was manufactured before 1978, lead exposure is possible during sanding. Professional refinishers understand lead safety protocols. They use containment and specialized equipment to prevent lead dust dispersal.
Lead-based glazes on vintage cast iron tubs pose serious health risks during sanding. If your tub predates 1978, professional refinishing is strongly recommended to avoid lead exposure to your family.
DIY vs. Professional Refinishing: What Makes the Difference
The choice between DIY and professional refinishing hinges on skill, time, and acceptable risk.
DIY refinishing saves money upfront. You avoid labor costs. However, mistakes are expensive. A failed DIY job often requires professional correction, which costs more than hiring a professional initially.
Professional refinishers bring expertise. They understand surface chemistry, coating compatibility, and application techniques refined over thousands of jobs. At Century BathTubs, our team has handled clawfoot tubs across Toronto and the GTA since 1995.
Professionals use commercial-grade coatings often unavailable to consumers. These products cure harder and last longer. They also apply coatings in controlled environments, temperature and humidity matter tremendously for epoxy and polyurethane.
Professional work typically includes a guarantee. If the coating fails prematurely, the refinisher fixes it at no cost. DIY work carries no such protection.
Time is another factor. Professional refinishing takes 1-2 days. Your tub is out of service briefly. DIY projects stretch across weeks when you account for prep, application, drying, and curing.
For most homeowners, professional refinishing delivers better value. The coating lasts longer, looks better, and carries a guarantee. For those comfortable with precision work and willing to invest time, quality DIY is possible, but it demands discipline.
A worn clawfoot tub doesn’t have to be replaced. The right paint for clawfoot tub exterior restores its beauty and extends its life by years.
Frequently Asked Questions
What kind of paint is best for the outside of a clawfoot tub?
Epoxy-based coatings offer the best durability for clawfoot tub exteriors, lasting 5-10 years with proper application. Polyurethane finishes provide strong water resistance and flexibility, while acrylic latex paints are easier to apply but may require recoating sooner. The choice depends on your climate, desired finish, and whether you’re tackling the project yourself or hiring professionals. Our EP-ACRYLIC coating system delivers durable longevity and protection against moisture damage.
Do you need to prime a clawfoot tub before painting it?
Yes, priming is essential for proper paint adhesion on cast iron or porcelain clawfoot tubs. Use a bonding primer designed for metal or ceramic surfaces to ensure the topcoat adheres correctly and resists peeling. Skipping this step significantly reduces paint durability and increases the risk of failure within months. Professional refinishers apply primer systems that create a strong foundation for long-lasting results.
How long does paint take to cure on a clawfoot tub exterior?
Cure time varies by paint type: acrylic latex typically cures in 24-48 hours, polyurethane finishes require 3-7 days, and epoxy-based coatings may need 5-14 days for full hardness. Even after the surface feels dry, the paint continues to cure and harden. During this period, avoid water exposure and heavy use. Professional systems can offer faster bathroom use with proper handling.
Is bathtub refinishing safe for families?
Professional bathtub refinishing, when performed by trained technicians in properly ventilated spaces, prioritizes safety. DIY painting carries higher risks due to improper ventilation, chemical exposure, and potential coating failures that could expose old lead-based paints in vintage tubs. Our licensed and insured professionals follow safety protocols, use approved materials, and ensure proper curing before bathroom use.