

Table of Contents
- When DIY Bathtub Chip Repair Makes Sense
- Best Bathtub Repair Kit Canada Homeowners Trust
- Step-by-Step: Fixing a Bathtub Chip Yourself
- How to Prevent Bathtub Chips Before They Start
- Bathtub Refinishing Cost Toronto: When Professional Help Pays Off
- Common Mistakes to Avoid When Repairing Chips
- Frequently Asked Questions
Last Updated: September 30, 2026
When DIY Bathtub Chip Repair Makes Sense
Small chips in your bathtub don’t require professional help every time. Knowing when to fix bathtub chips yourself versus calling a pro saves money and stress. The decision depends on three things: chip size, depth, and your tub material.
Small chips versus deep damage
A small chip is typically less than half an inch across and doesn’t expose the underlying material. These are perfect for DIY repair. Deep cracks, large gouges, or damage that exposes the tub’s base layer are different stories. If water seeps into the crack, the damage spreads quickly beneath the surface. That’s when professional refinishing becomes the smarter choice.
The rule is simple: if you can fit a toothpick into the damage, it’s shallow enough for home repair. If the chip is wider than your pinky nail or you see different colored material underneath, professional help prevents bigger problems later.
Material type matters
Acrylic tubs are forgiving. They’re softer and easier to repair with standard kits. Porcelain and cast iron are harder and more brittle. Porcelain chips can spread if not sealed properly. Cast iron rusts when exposed, making quick repair essential.
Check your tub type before starting. Run your fingernail across the edge. Acrylic feels smooth and slightly warm. Porcelain is cold and harder. Cast iron is heavy and magnetic. Knowing your material helps you pick the right repair compound and avoid wasting time on incompatible products.
Best Bathtub Repair Kit Canada Homeowners Trust
A quality repair kit makes the difference between a fix that lasts and one that fails in months. The best bathtub repair kits include everything you need in one box. You don’t want to buy supplies separately and discover halfway through that something’s missing.
What to look for in a repair kit
The kit should contain a cleaning solution, sandpaper, repair compound, a brush or applicator, and clear instructions. Some kits add extra sandpaper or sealant. More items mean fewer trips to the hardware store. Look for kits that match your tub material. A kit labeled for acrylic won’t work well on porcelain.
The repair compound is the most important part. It should cure hard and match your tub color closely. White, almond, and bone are common colors. If your tub is an unusual shade, test the compound on a hidden spot first. Some compounds dry glossy while others dry matte. Check what finish your tub has before ordering.
Acrylic versus porcelain repair differences
Acrylic repair compounds are thicker and easier to apply. They sand smooth without much effort. Acrylic tubs are flexible, so repairs flex with them and don’t crack from temperature changes. Most DIY kits target acrylic because it’s the most common tub material in homes.
Porcelain requires harder, more brittle compounds. These cure faster but need more careful sanding. Porcelain doesn’t flex, so the repair compound must be rigid to prevent cracking. Porcelain repairs also need a glossy topcoat to match the original finish. If you have porcelain, buy a kit specifically labeled for porcelain or ceramic. Using an acrylic kit on porcelain usually fails within months.
Test any repair kit on a small, hidden chip first. This tells you if the color matches and how the compound handles before you tackle a visible spot.
Step-by-Step: Fixing a Bathtub Chip Yourself
The repair process takes about two hours from start to finish. Most of that time is waiting for the compound to cure. Actual hands-on work is closer to 30 minutes. Plan to keep the tub out of use for at least 24 hours after sealing.
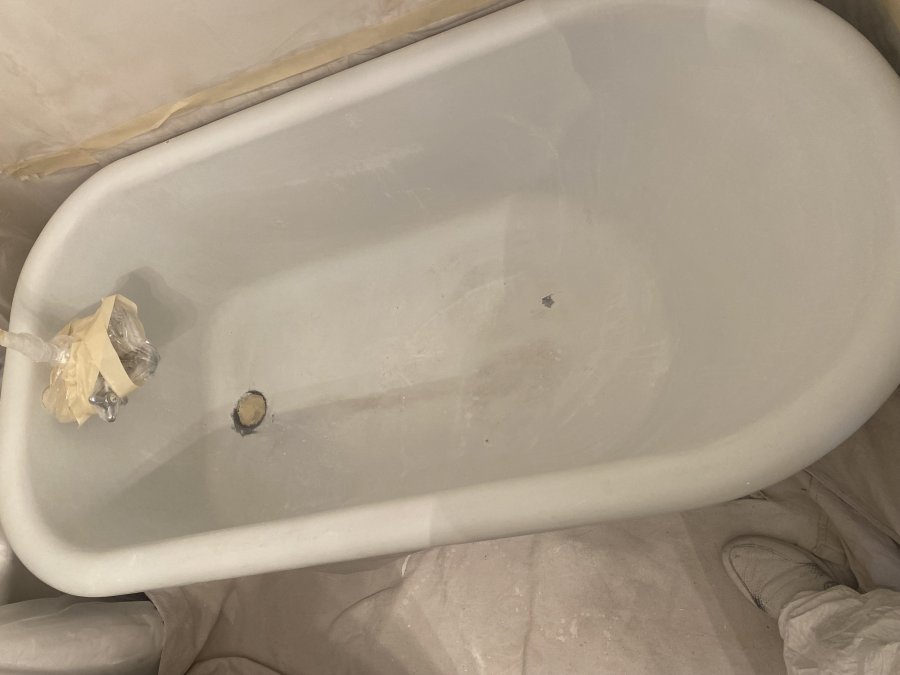
Step 1: Clean and dry the damaged area
Use the cleaning solution from your kit or a degreaser. Scrub the chip and the area around it thoroughly. Dirt and soap buildup prevent the repair compound from bonding. Let the area dry completely. If moisture is trapped under the repair compound, it will fail. Use a clean cloth or paper towel to dry the spot. Wait at least 30 minutes for all moisture to evaporate.
Step 2: Sand the chip edges smooth
Use the coarse sandpaper included in your kit. Sand the edges of the chip gently. You’re not trying to make the chip bigger. You’re smoothing rough edges so the repair compound adheres properly. Sand in small circles. Stop when the edges feel smooth to your fingertip. Wipe away all dust with a damp cloth and let it dry again.
Step 3: Apply the repair compound
Follow your kit’s instructions for mixing. Some compounds come pre-mixed. Others require combining two parts. Mix thoroughly. Apply the compound with the brush or applicator included in the kit. Press it firmly into the chip. Overfill slightly so the compound sits higher than the surrounding tub. The excess gets sanded down in the next step.
Step 4: Cure and sand for a smooth finish
Let the compound cure for the time listed in your kit instructions. This is usually 4 to 8 hours. Don’t use the tub during this time. Once cured, use fine sandpaper to smooth the repair flush with the tub surface. Sand gently in circular motions. The goal is a smooth surface level with the surrounding area. Wipe away all dust.
Step 5: Seal and protect the repair
Apply the sealant from your kit over the repair. This protects the compound from water damage and UV light. Let it cure fully before using the tub. Most sealants need 24 hours. Read your kit’s instructions. The sealant is what makes the repair last years instead of months.
Skipping the sealant step is the most common reason DIY repairs fail. Water seeps into the compound and causes it to crack and peel. Always seal the repair, even if it adds extra wait time.
How to Prevent Bathtub Chips Before They Start
Most chips happen from impact. A dropped bottle, a heavy object falling, or sharp contact with the tub edge causes damage. Prevention is easier than repair. Small habits protect your tub and extend its life by years.
Daily habits that protect your tub
Use a bath mat with a non-slip backing. This cushions impacts and prevents slipping. Don’t drop heavy items in the tub. Keep bottles and tools away from the edges. When cleaning, use soft cloths and gentle scrubbing. Harsh abrasive pads scratch and weaken the surface.
Avoid extreme temperature changes. Don’t fill the tub with very hot water and then add cold water suddenly. Thermal shock stresses the material and can cause small cracks. Let hot water cool slightly before adding cold. Use lukewarm water when possible.
Keep the tub dry between uses. Standing water promotes mold and weakens the surface over time. Wipe down the tub after bathing. Good ventilation prevents moisture buildup. Open a window or run the exhaust fan during and after showers.
Maintenance routines that extend tub life
Clean the tub weekly with mild soap and water. Avoid abrasive cleaners that scratch the surface. For stubborn stains, use baking soda and a soft cloth. Never use bleach or harsh chemicals on acrylic tubs. These degrade the material and cause discoloration.
Inspect your tub monthly for small cracks or chips. Catching damage early makes repairs easier and cheaper. If you spot a chip, repair it quickly before water seeps underneath. A small repair now prevents a large problem later.
Caulk around the tub edges yearly. Caulk prevents water from seeping into the walls and subfloor. When caulk cracks or peels, replace it promptly. This simple step prevents expensive water damage to your home’s structure.
Bathtub Refinishing Cost Toronto: When Professional Help Pays Off
DIY repair works for small, shallow chips. But some damage requires professional refinishing. Knowing the difference saves you time and money.
Why refinishing outperforms DIY for extensive damage
If your tub has multiple chips, deep cracks, or large stains, refinishing is the better choice. Professional refinishing covers the entire tub surface with a durable new coating. This hides all damage and restores the tub’s appearance completely. A single DIY repair can’t match that result.
Professional refinishing also lasts longer.
If your tub has more than three chips, visible cracks, or extensive staining, professional refinishing delivers better results and lasts longer than DIY repair.
Common Mistakes to Avoid When Repairing Chips
Most DIY repair failures come from rushing or skipping steps. These mistakes are easy to avoid if you know what to watch for.
Frequently Asked Questions
Can you fix a chip in a bathtub yourself?
Small chips in acrylic or porcelain bathtubs can be repaired at home using a quality repair kit. Clean the area thoroughly, sand the edges smooth, apply the repair compound, and seal it once cured. However, deep cracks, chips larger than 5 centimetres, or damage near the drain require professional attention to prevent water leaks and structural damage.
What is the best bathtub repair kit Canada homeowners can buy?
Look for kits that match your tub material: acrylic-specific or porcelain-specific formulas. The best kits include sandpaper, repair putty or epoxy, colour-matching options, and a sealer. Verify the product is rated for bathroom use and offers durability comparable to professional coatings. Check product reviews from Canadian retailers for real-world performance feedback.
How long does a DIY bathtub chip repair last?
A properly applied DIY repair typically lasts 1-3 years depending on the product quality, the size of the chip, and how much wear the tub receives. Professional refinishing systems like EP-ACRYLIC coatings are engineered to last significantly longer and come with guarantees. Repairs in high-traffic areas or near the drain tend to wear faster than repairs in low-impact zones.
How do I match the color of my bathtub during a repair?
Most repair kits include colour-matching options or white as a standard. Test the colour on a hidden area first. If your tub is an unusual shade, take a photo or sample to a home improvement store and compare it against available repair products. Some professional services can custom-match colours, which is one reason refinishing may be worth considering for visible damage.