

Table of Contents
- Understanding Acrylic Bathtub Cracks and Their Causes
- Tools and Materials Needed for Bathtub Crack Repair
- Step-by-Step Process for Repairing Cracks in Acrylic Bathtub Surface
- Choosing the Right Acrylic Bathtub Repair Kit
- Common Mistakes to Avoid When Repairing Cracks
- Understanding Acrylic Tub Crack Repair Cost and Long-Term Durability
- Preventing Cracks in Acrylic Bathtubs: Maintenance Tips
- Troubleshooting Failed Repairs and When to Call a Professional
Last Updated: July 15, 2026
Understanding Acrylic Bathtub Cracks and Their Causes
Cracks in acrylic bathtubs stem from one of two sources: improper installation or flexing caused by inadequate support underneath the tub. Acrylic is lightweight and flexible by design, making it affordable and easy to install. However, when a tub isn’t properly supported, it flexes under the weight of water and a person, creating stress points that eventually crack. The good news is that many cracks can be repaired without replacing the entire tub, saving thousands of dollars.
Hairline Cracks vs. Stress Cracks
Hairline cracks are thin, surface-level fractures typically 2-4 inches long that don’t penetrate deeply into the acrylic. These are primarily cosmetic but can allow water seepage if left untreated. Stress cracks are wider, deeper, and often appear near the drain or along the sides. They develop because the acrylic bends under pressure and compromise structural integrity.
This distinction matters because hairline cracks can be repaired with epoxy filler and topcoat, while stress cracks require structural reinforcement underneath to prevent recurrence. Repairing a stress crack without addressing the flexing will result in the crack returning within weeks or months.
Why Flexing Causes Damage
When you fill a tub with 40-60 gallons of water and step into it, the acrylic deflects under combined weight. In poorly supported tubs, this deflection is significant and repetitive. Over months and years, this flexing fatigues the acrylic material, creating microscopic stress points that eventually become visible cracks. Cracks typically appear near the drain where the tub is thinnest, along the sides where support is weakest, or at corners where stress concentrates.
Tools and Materials Needed for Bathtub Crack Repair
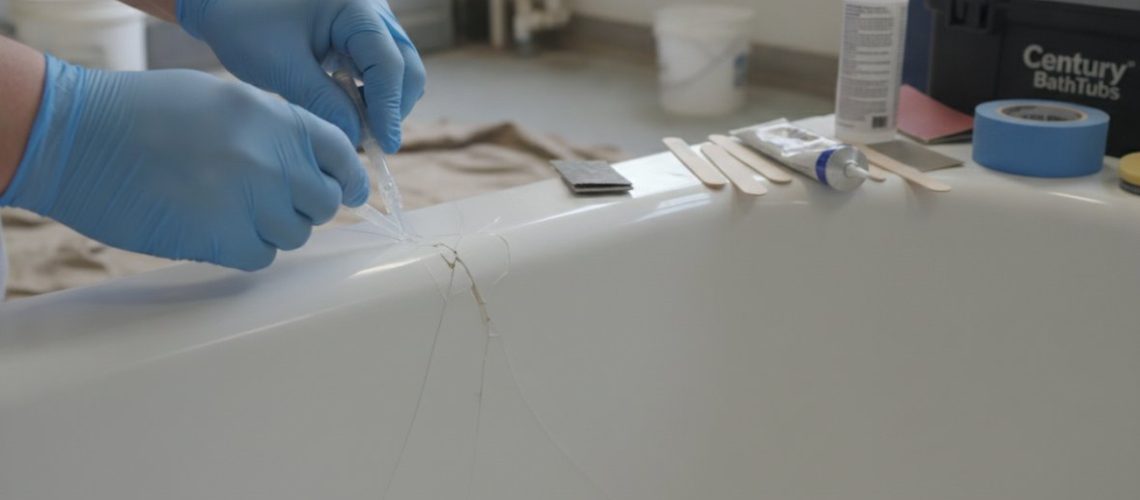
Gather the right tools before starting any repair. You’ll need sandpaper in multiple grits: 80-grit for initial surface preparation, 120-grit for smoothing, and 220-grit for final finishing. A two-part epoxy resin is essential for bonding and filling cracks deeper than hairline fractures. You’ll also need a putty knife, degreaser, acetone, fiberglass mesh tape for structural reinforcement, and a two-part polyurethane topcoat for sealing and finishing.
Safety Equipment and Ventilation
Working with epoxy resin and acetone requires proper safety precautions. Wear a respirator with organic vapor cartridges, nitrile gloves, and safety glasses. Ventilation is non-negotiable, open all windows and use a fan to exhaust fumes outside. Never work in a sealed bathroom; accumulated fumes cause dizziness, headaches, and respiratory irritation.
| Safety Item | Purpose | Why It Matters |
|---|---|---|
| Organic vapor respirator | Filters epoxy and solvent fumes | Prevents respiratory irritation and headaches |
| Nitrile gloves | Protects skin from epoxy contact | Epoxy is difficult to remove and can irritate skin |
| Safety glasses | Protects eyes during sanding and mixing | Dust and splashes can cause eye damage |
| Open windows + ventilation fan | Exhausts fumes outside | Accumulated fumes cause dizziness and nausea |
Step-by-Step Process for Repairing Cracks in Acrylic Bathtub Surface
The repair process follows a logical sequence: prepare the surface, address structural issues, apply filler, sand smooth, and finish.
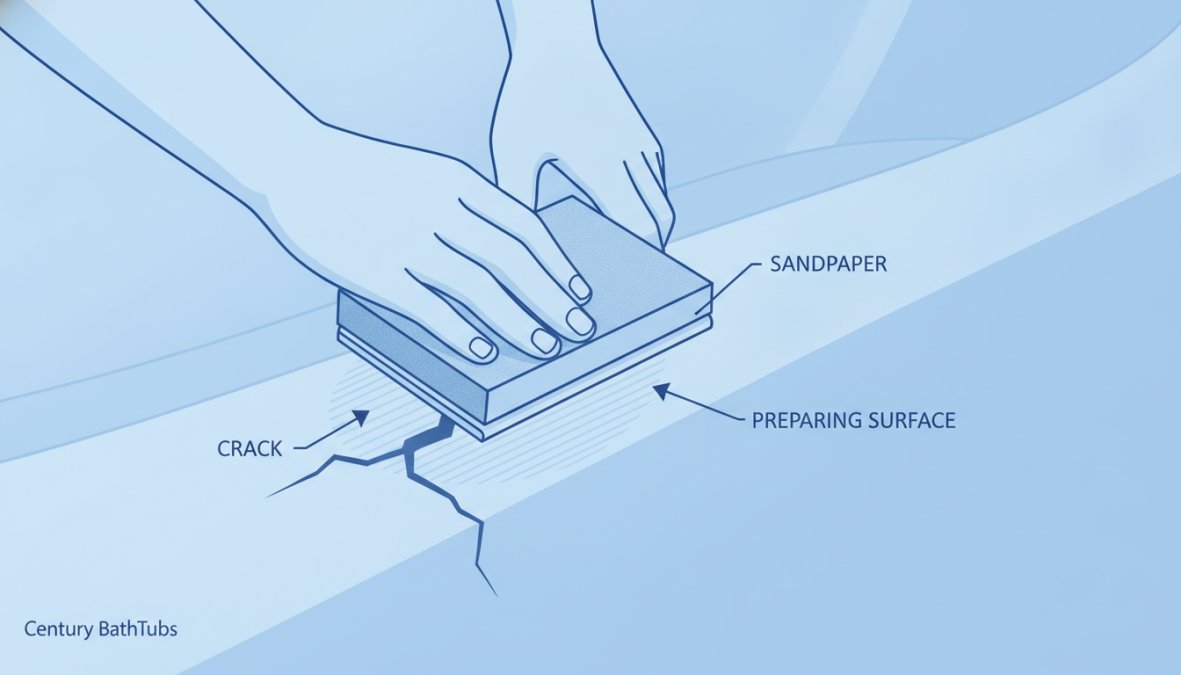
Step 1: Clean and Prepare the Surface
Drain the tub completely and let it dry for at least 24 hours. Any moisture will prevent proper epoxy bonding. Use a degreaser to clean the area around the crack, extending at least 6 inches in each direction. This removes soap residue, hard water deposits, and oils that might interfere with adhesion. Use a rotary tool or small chisel to clean out the crack itself, removing any loose material or debris.
Step 2: Sand the Damaged Area
Use 80-grit sandpaper to sand the area around the crack, extending 3-4 inches in each direction. Sand in circular motions to create a slightly rough surface that helps epoxy bond better. After sanding, wipe away dust with a damp cloth and let it dry. The surface should feel slightly rough to the touch.
Step 3: Eliminate Tub Flexing with Structural Reinforcement
This step separates a temporary patch from a lasting repair. From underneath the tub, apply fiberglass mesh tape directly behind the crack. The mesh bonds to the acrylic and distributes stress across a wider area, preventing the crack from reopening. If you can’t access the underside, use a two-part epoxy with fiberglass strands mixed in to reinforce from inside.
Skipping structural reinforcement is the most common reason DIY bathtub crack repairs fail. [If the](/how-to-fix-peeling-bathtub-finish/) underlying flexing isn’t addressed, the crack will return within weeks or months.
Step 4: Mix and Apply the Epoxy Resin Filler
Mix two-part epoxy resin in precise proportions according to instructions. Mix only as much as you can apply within 5-10 minutes. Apply the mixed epoxy into the crack using a putty knife, pressing it deep into the fracture. Overfill slightly since epoxy shrinks as it cures. For wider cracks, apply in layers, allowing each to cure (typically 2-4 hours) before applying the next.
Step 5: Sand the Filler Smooth
Once fully cured, use 120-grit sandpaper to sand the repair area smooth. Switch to 220-grit sandpaper for final finishing. Sand until the repair is level with the surrounding surface and feels smooth to the touch. Wipe away all dust with a damp cloth and let it dry completely.
Step 6: Apply Topcoat and Finish
Apply the topcoat according to product instructions, typically using a brush or roller. Apply thin, even coats rather than one thick coat. Most topcoats require 24-48 hours of curing before the tub can be used. Keep the area dry during this time.
Step 7: Buff and Polish for Professional Results
After the topcoat has fully cured, use a polishing compound and soft cloth to buff the repair area. This removes minor imperfections and restores the glossy finish that matches the rest of the tub.
Test the topcoat on a hidden area first. Acrylic bathtubs vary in color depending on age and sun exposure, and a topcoat that’s too light or too dark will be visible.
Choosing the Right Acrylic Bathtub Repair Kit
A comprehensive repair kit is worth the extra cost because it includes everything needed for a professional-quality repair: two-part epoxy, fiberglass mesh, topcoat, sandpaper, and detailed instructions. When evaluating kits, check that the epoxy is specifically formulated for acrylic. Look for products that explicitly state they’re designed for bathtub or acrylic repair.
Two-Part Epoxy vs. Single-Component Options
Two-part epoxy is the gold standard because it creates a strong, durable bond that cures to a hard finish. Single-component fillers are easier to apply but don’t cure as hard or bond as strongly. For hairline cracks that are purely cosmetic, single-component filler might be acceptable. For stress cracks or deeper damage, two-part epoxy is essential. Two-part epoxies typically cure in 2-4 hours, faster than single-component fillers.
Color Matching Challenges and Solutions
Acrylic bathtubs fade over time, especially in bathrooms with good natural light. A bright white topcoat applied to a slightly yellowed tub will create a visible patch. Test the topcoat on a hidden area first, inside the overflow hole or under the rim, to ensure it matches before applying to the visible repair. Some manufacturers offer topcoats in different shades to match aged acrylic.
Common Mistakes to Avoid When Repairing Cracks
The most frequent mistake is skipping surface preparation. Applying epoxy to a glossy, unsanded acrylic surface results in poor bonding. Always sand the area thoroughly before applying any filler.
Another common error is using the wrong type of epoxy. General-purpose epoxies designed for wood or metal don’t bond well to acrylic. Buy epoxy specifically formulated for bathtub repair.
Many people also fail to address the underlying flexing problem. If the tub is flexing, you must reinforce the structure from underneath or the crack will return. This is non-negotiable for stress cracks.
Finally, rushing the curing process causes problems. Epoxy needs time to fully harden before you sand or apply topcoat. Check the product instructions and wait the full recommended curing time.
Understanding Acrylic Tub Crack Repair Cost and Long-Term Durability
The cost of repairing cracks varies dramatically depending on whether you tackle it yourself or hire a professional. A DIY repair using a quality kit costs significantly less than professional refinishing, though professional service offers expertise and durability guarantees.
DIY vs. Professional Repair Investment
A comprehensive DIY repair kit is affordable, with a time investment of 4-6 hours spread across multiple days for curing. If the repair succeeds, you’ve saved significantly compared to professional service. If it fails, you may need to hire a professional anyway.
Professional refinishing services offer several advantages: trained technicians identify root causes and reinforce structures properly, use commercial-grade materials more durable than consumer kits, and provide warranties. Century BathTubs offers a three-year hassle-free guarantee on all refinishing work. For homeowners with multiple cracks, failed previous repairs, or low confidence in their ability, professional service makes sense.
Long-Term Durability Testing and Curing Time
A well-executed repair using quality two-part epoxy and topcoat can last 5-10 years or longer. Curing time is critical to durability. Two-part epoxy typically requires 24-48 hours of full cure before the tub can be used. Temperature and humidity affect curing time; epoxy cures faster in warm, dry conditions and slower in cold, humid environments.
Preventing Cracks in Acrylic Bathtubs: Maintenance Tips
The best approach to bathtub cracks is prevention through proper installation, regular maintenance, and mindful use.
Reducing Structural Stress and Flexing
Proper support is the foundation of crack prevention. A bathtub must be fully supported underneath, not just at the edges. If your tub was installed on a wooden subfloor without proper bracing, flexing is inevitable. If you’re experiencing recurring cracks despite repairs, the underlying support is likely the culprit. Consider having a professional assess the installation.
Regular Cleaning and Protection
Use mild, non-abrasive cleaners and avoid bleach-based products, which can weaken acrylic over time. Dry the tub after each use to prevent water spots and mineral deposits. Avoid using the tub for storage or standing on edges, which creates unnecessary stress that can initiate cracks.
If you notice a small crack forming, address it immediately. Small cracks are quick and inexpensive to repair. Waiting allows the crack to grow, making repair more difficult and expensive.
Troubleshooting Failed Repairs and When to Call a Professional
If the crack reappears within weeks of repair, the underlying flexing issue was not addressed. This is the time to either reinforce the structure properly or call a professional.
If the epoxy didn’t bond well and is peeling away, the surface wasn’t properly prepared. Remove the failed epoxy, sand thoroughly, and reapply with proper technique. If you’re not confident, a professional can fix it.
If the topcoat color doesn’t match, apply a thin topcoat to the entire tub to even out appearance, or consider professional refinishing.
Call a professional if the tub has multiple cracks, previous repairs have failed, you’re not confident in your ability, or the crack is in a structural location like near the drain. Professional technicians have the experience and tools to assess the root cause and deliver a durable repair.
Bathtub cracks don’t require immediate replacement. With proper surface preparation, addressing underlying flexing, using quality materials, and allowing adequate curing time, most cracks can be repaired successfully and inexpensively. For homeowners who prefer professional expertise and durability guarantees, Century BathTubs offers comprehensive crack repair and refinishing services backed by a three-year hassle-free guarantee. Our licensed, insured technicians have restored thousands of bathtubs since 1995, extending fixture life and saving homeowners thousands of dollars compared to replacement. Contact Century BathTubs today for a free assessment of your bathtub repair needs.
Frequently Asked Questions
Can you repair a crack in an acrylic bathtub?
Yes, most cracks in acrylic bathtubs can be repaired using a two-part epoxy resin filler and topcoat system. Hairline cracks and small stress cracks respond well to DIY repair kits, while larger cracks may require professional attention. The repair process involves surface preparation, sanding, applying epoxy filler, and finishing with a protective topcoat to restore the bathtub's appearance and prevent water leakage.
What is the best filler for acrylic bathtub cracks?
Two-part epoxy resin is considered the best filler for acrylic bathtub cracks because it offers superior bonding and adhesion to acrylic surfaces. Epoxy-based repair kits cure to a hard finish that resists water and wear. Look for products specifically formulated for acrylic bathtubs with good color matching options. Ensure the filler is compatible with your bathtub's existing finish and follow the manufacturer's curing time guidelines for optimal durability.
How long does an acrylic bathtub repair last?
A properly executed acrylic bathtub repair using quality epoxy resin and topcoat can last several years with proper maintenance. Curing time is critical, most two-part epoxy systems require 24-48 hours of full curing before the bathtub can be used. Long-term durability depends on addressing the root cause (such as structural flexing), using appropriate grit sandpaper for surface preparation, and applying a durable topcoat. Professional repairs often come with guarantees, while DIY repairs depend on technique and material quality.
How much does it cost to repair a crack in an acrylic tub?
The cost of acrylic tub crack repair varies depending on the damage severity, repair method, and location. DIY repair kits are generally more affordable than professional services. For specific pricing on professional acrylic bathtub repair services in Toronto and the GTA, contact Century BathTubs directly for a free inquiry and personalized quote. Factors affecting cost include the extent of structural reinforcement needed, color matching complexity, and whether the entire tub surface requires refinishing.
This article was written using GrandRanker