


Table of Contents
- What You’ll Need Before You Start
- Step 1: Inspect and Prep Your Clawfoot Tub
- Step 2: Repair Chips, Rust, and Cracks
- Clawfoot Tub Repair Kit vs Professional Service
- Step 3: Apply the Best Coating to Restore Your Clawfoot Tub
- Benefits of EP-ACRYLIC Coating for Tubs
- Bathtub Reglazing Drying Time Requirements
- Common Mistakes to Avoid When You Restore a Clawfoot Tub
- Frequently Asked Questions
Last Updated: September 26, 2026
What You’ll Need Before You Start
To restore clawfoot tub finishes yourself, you can do the job on your own, but only if you set up properly first. A clawfoot tub is a freestanding cast iron or acrylic tub that sits on decorative feet, and its age is exactly why it needs careful handling. Many older cast iron models were finished with coatings that can contain lead, so prep work matters for your safety, not just your results.
Gather these before you touch the tub:
- A clawfoot tub repair kit with epoxy filler and a chip repair compound
- Sandpaper in 120, 220, and 400 grit
- A marine-grade or tub-specific bonding primer
- Drop sheets and painter’s tape
- A respirator rated for solvent vapors
- Gloves, eye protection, and a window fan for airflow
- Clean rags and a degreaser
If you would rather not handle the prep and coating yourself, Century BathTubs has refinished tubs across Toronto and the GTA since 1995, and our team is licensed and insured.
Skipping the degreasing step is the single most common cause of peeling coatings. Any soap scum, oil, or silicone residue left on the surface will stop the new finish from bonding, and the whole job can fail within months.
Step 1: Inspect and Prep Your Clawfoot Tub
The best way to restore clawfoot tub surfaces starts with an honest inspection. Look for rust around the drain, chips along the rim, and hairline cracks near the overflow. Run your hand along the inside surface; if it feels chalky, the old finish is breaking down and needs full removal.
Prep follows a fixed order:
- Remove the faucet, drain, and overflow fittings.
- Scrub the tub with a degreaser, then rinse and dry fully.
- Sand the surface with 220 grit, then 400 grit for a smooth base.
- Wipe away all dust with a tack cloth.
- Mask the feet and the surrounding floor.
The prep stage usually takes longer than the coating itself. That is normal, and rushing it is a mistake.
Step 2: Repair Chips, Rust, and Cracks
Damage repair decides whether your finish lasts. Small chips and surface rust are simple to fix with an epoxy filler. Deep cracks or soft, crumbling rust need more care, because a coating will not hide structural damage underneath.
Work through the damage like this:
- Sand rust down to bare metal, then treat it with a rust converter.
- Fill chips and cracks with epoxy, building in thin layers.
- Let each layer cure before adding the next.
- Sand the filled area flush once it hardens.
A common mistake is filling a deep crack in one thick pass. The filler traps air, shrinks as it dries, and leaves a visible dip under the new coating.
Clawfoot Tub Repair Kit vs Professional Service
The clawfoot tub repair kit vs professional service decision comes down to damage depth and your comfort with surface prep. A kit works well for light chips, minor rust, and surface scuffs. A professional service makes more sense for deep cracks, heavy rust, or a tub you cannot easily move.
| Situation | Best Option | Why |
|---|---|---|
| Light chips and scuffs | DIY repair kit | Low cost, simple fix |
| Surface rust spots | DIY repair kit | Easy to sand and treat |
| Deep cracks or holes | Professional service | Needs structural repair |
| Heavy rust near drain | Professional service | Risk of hidden damage |
| Landlord with several units | Professional service | Faster, consistent results |
If you are unsure how deep the damage goes, have it looked at before you buy supplies. A failed DIY repair on a badly cracked tub costs more than doing it right the first time.
Step 3: Apply the Best Coating to Restore Your Clawfoot Tub
The coating you choose decides how long the finish survives. For a lasting result, use a two-part epoxy or acrylic system made for tubs, not standard paint. Apply a bonding primer first, then build the topcoat in thin, even layers.
Follow this sequence:
- Apply the primer with a fine roller or spray gun.
- Let it dry to a tacky state before the topcoat.
- Apply two to three thin topcoat layers, not one thick one.
- Keep airflow steady and the room dust-free.
Thin layers bond better and dry more evenly. A thick single coat looks fine at first, then sags, bubbles, or peels once it cures.
Warm the room to a steady temperature before you coat. Cold surfaces stop epoxy from curing properly, and a cool bathroom is one of the most common reasons a DIY refinish fails overnight.
Benefits of EP-ACRYLIC Coating for Tubs
The benefits of EP-ACRYLIC coating for tubs come down to durability and speed. EP-ACRYLIC is a two-part coating system that bonds tightly to prepared surfaces and cures faster than many traditional refinishing products. That fast cure matters when a household has only one bathroom.
Key advantages include:
- A hard finish that resists chipping and staining
- Fast drying, so the tub returns to use sooner
- A strong bond that holds up to daily cleaning
- A smooth, factory-style surface that hides old stains
Century BathTubs uses the EP-ACRYLIC coating system on every job, and it comes with a three-year hassle-free guarantee. That guarantee answers the question most homeowners ask first: will this actually last?
Bathtub Reglazing Drying Time Requirements
Bathtub reglazing drying time requirements vary by stage, and respecting them is what protects your new finish. A tub is usually dry to the touch within a few hours, but full cure takes longer. Light use comes before full water exposure.
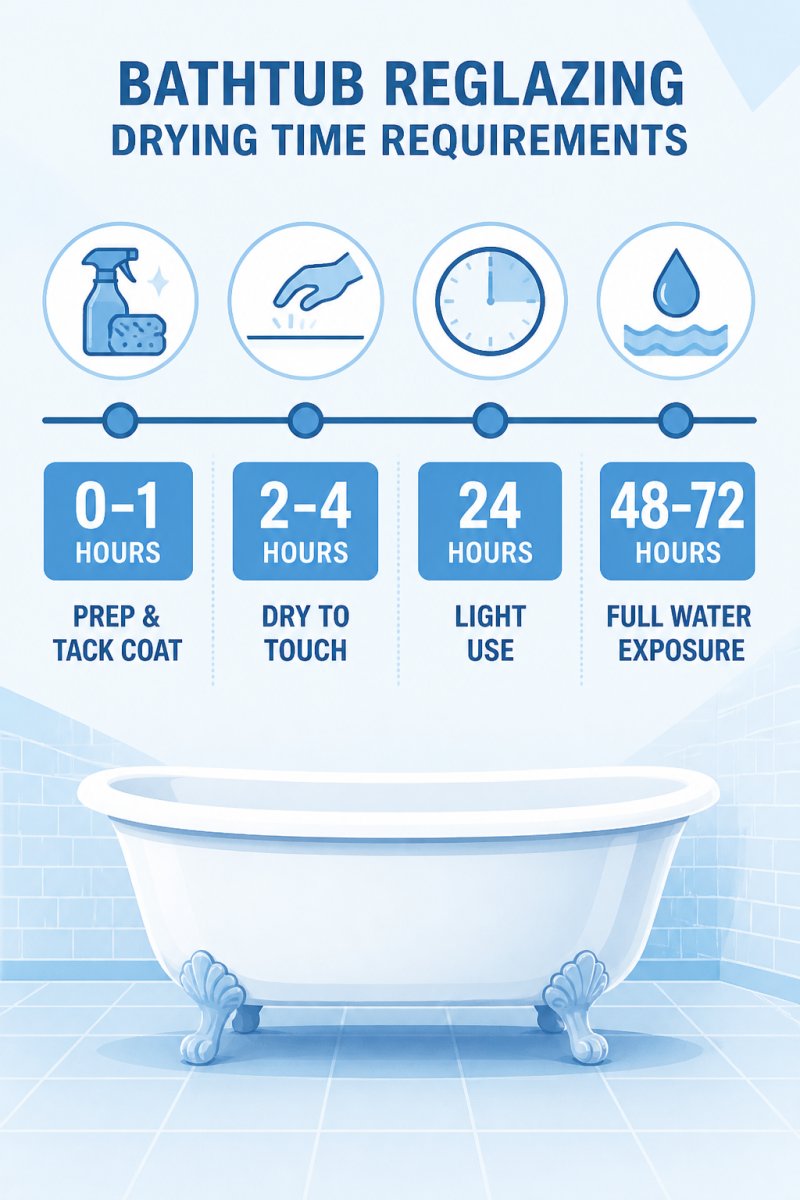
Plan around these phases:
- Dry to touch: a few hours after the final coat
- Light use: roughly 24 hours later
- Full water exposure: usually 48 to 72 hours
Exact times depend on the coating, room temperature, and airflow. A professional job removes the guesswork, because the technician sets the schedule and confirms when the tub is ready.
Common Mistakes to Avoid When You Restore a Clawfoot Tub
Most failed restorations trace back to a handful of avoidable errors. Fix these and your finish will last far longer.
- Skipping degreasing: residue stops the coating from bonding.
- Coating over rust: trapped rust keeps spreading under the finish.
- Using thick single coats: these sag, bubble, and peel.
- Coating a damp surface: moisture traps under the finish.
- Ignoring cure times: early water exposure ruins the bond.
- Choosing wall paint: it is not made for wet, high-traffic surfaces.
If you want the job done once and done right, Century BathTubs handles the full process, from prep to final cure. We work with homeowners, landlords, and property managers across Toronto who need a fast, cost-effective update without a full replacement.
Frequently Asked Questions
Is it worth refinishing an old clawfoot tub?
Yes, for most cast iron clawfoot tubs in good structural shape. Refinishing costs far less than replacement and keeps the original cast iron, which is denser and retains heat better than modern acrylic or fibreglass tubs. A professional service using a durable coating such as EP-ACRYLIC can extend the tub’s life by years. If the tub has deep structural cracks or heavy rust-through, a technician should assess whether repair or replacement makes more sense.
Can you refinish a clawfoot tub yourself?
You can, but results vary widely. DIY kits work for minor scuffs and small chips, while full refinishing requires thorough surface prep, rust treatment, and a dust-free application space. Common DIY problems include peeling at the drain, uneven finish, and premature wear. If your tub has deep cracks, heavy rust, or previous failed coatings, a professional service is usually the better route. Always compare a repair kit vs professional service based on the damage.
How long does a professional clawfoot tub refinishing last?
With proper surface preparation and a quality coating system, a professional refinish can last many years. Longevity depends on daily use, cleaning products, and whether the tub was fully cured before first use. Century BathTubs backs its work with a three-year hassle-free guarantee, which gives you a clear benchmark. Avoiding abrasive cleaners and following the recommended drying time requirements will help the finish hold up.
Do I need to remove the clawfoot tub to refinish it?
In most cases, no. A professional can refinish the tub in place, which keeps the project faster and less disruptive. The tub only needs to be removed if the feet, plumbing, or underside require repair, or if the tub must be refinished on all sides. For standard interior refinishing, in-place work is the norm. Ask your provider during the initial inquiry so you know what to expect.
Restoring a clawfoot tub yourself is possible, but deep damage and cure timing trip up most DIY attempts. Century BathTubs takes the risk out of the job with the EP-ACRYLIC coating system, licensed and insured technicians, and a three-year hassle-free guarantee on every refinish. Get started with Century BathTubs and bring your old tub back to life with a finish built to last.