

Table of Contents
- Understanding the Bathtub Refinishing Process Step by Step
- Tools, Materials, and Safety Gear You’ll Need
- Surface Preparation: The Foundation of Success
- Repairing Chips, Cracks, and Surface Defects
- Etching and Applying the Bonding Agent
- Spraying or Rolling the Coating: Application Techniques
- Curing Time and Post-Application Care
- Bathtub Refinishing Cost in Canada: DIY vs. Professional
Last Updated: August 1, 2026
Understanding the Bathtub Refinishing Process Step by Step
Bathtub refinishing is one of the most cost-effective ways to restore a worn, stained, or damaged tub without full replacement. At Century BathTubs, we’ve helped homeowners and property managers in the Toronto and GTA area save thousands of dollars by understanding what’s involved in professional reglazing. Rather than replacing an old fixture, refinishing applies a durable new coating directly over your existing tub, extending its life by years while delivering a fresh appearance.
The process involves multiple critical stages, from surface preparation through final curing. A bathtub refinishing process that cuts corners typically results in peeling, chipping, or poor adhesion within months. This guide walks you through each stage, explaining what happens and why it matters.
According to research into bathroom renovation trends, homeowners prioritize cost savings and sustainability in bathroom updates, making refinishing an increasingly popular choice over replacement. The process works on cast iron, steel, acrylic, and fiberglass tubs, though each material has slightly different requirements.
The single biggest predictor of refinishing success is surface preparation. Technicians who spend 40% of their time on prep and 60% on coating application see significantly better durability than those who rush through cleaning and etching.
Tools, Materials, and Safety Gear You’ll Need
Proper equipment makes the difference between a professional-grade finish and a DIY disaster. Before starting, gather everything you’ll need to avoid breaking your workflow mid-project.
Core materials include a bonding agent (primer), topcoat (typically epoxy or acrylic-based), and safety equipment. Century BathTubs uses an EP-ACRYLIC coating system designed for durability and fast drying. Your coating choice determines what primer and solvents you need.
Essential materials:
- Bonding agent or primer rated for your tub material
- Epoxy or acrylic topcoat (2-3 coats typically required)
- Degreaser or TSP (trisodium phosphate) for cleaning
- Acid etch solution (muriatic acid or pre-mixed etch)
- Sandpaper (120-grit, 220-grit, and 400-grit)
- Masking tape and plastic sheeting
- Drop cloths or plastic tarps
- Cleaning supplies: sponges, brushes, lint-free cloths
Application equipment:
- Spray gun or HVLP (high-volume low-pressure) sprayer
- Foam roller as an alternative for smaller areas
- Paintbrushes for corners and edges
- Mixing containers and stir sticks
- Caulking gun and silicone caulk
Essential Safety Equipment and Ventilation Requirements
Bathtub refinishing chemicals, particularly epoxy coatings and acid etches, release volatile organic compounds (VOCs) that can cause respiratory irritation, dizziness, and in extreme cases, chemical burns. Proper ventilation and personal protective equipment are non-negotiable.
Ventilation setup:
- Open all windows and doors in the bathroom
- Set up a box fan in a window facing outward to create negative pressure
- Run the bathroom exhaust fan continuously during application and for at least 24 hours after
- If your bathroom has no exhaust fan, consider renting a portable air scrubber or completing work in warmer months
- Keep the bathroom door closed to prevent fumes from spreading
Personal protective equipment (PPE):
- Respirator with organic vapor cartridges (not a dust mask)
- Safety glasses or face shield
- Nitrile gloves
- Long sleeves and pants
- Closed-toe shoes or boot covers
Exposure to epoxy fumes during application and curing can trigger chemical sensitivity lasting weeks. If you don’t have proper respiratory protection, hire a professional instead.
Mixing acid etch with bleach or other cleaners creates toxic chlorine gas. Never use bleach in your preparation process. Use vinegar or hydrogen peroxide for mold instead.
Surface Preparation: The Foundation of Success
Surface preparation determines whether your new coating bonds properly or fails within months. This stage is tedious and impossible to rush. It’s where most DIY refinishing projects fail.
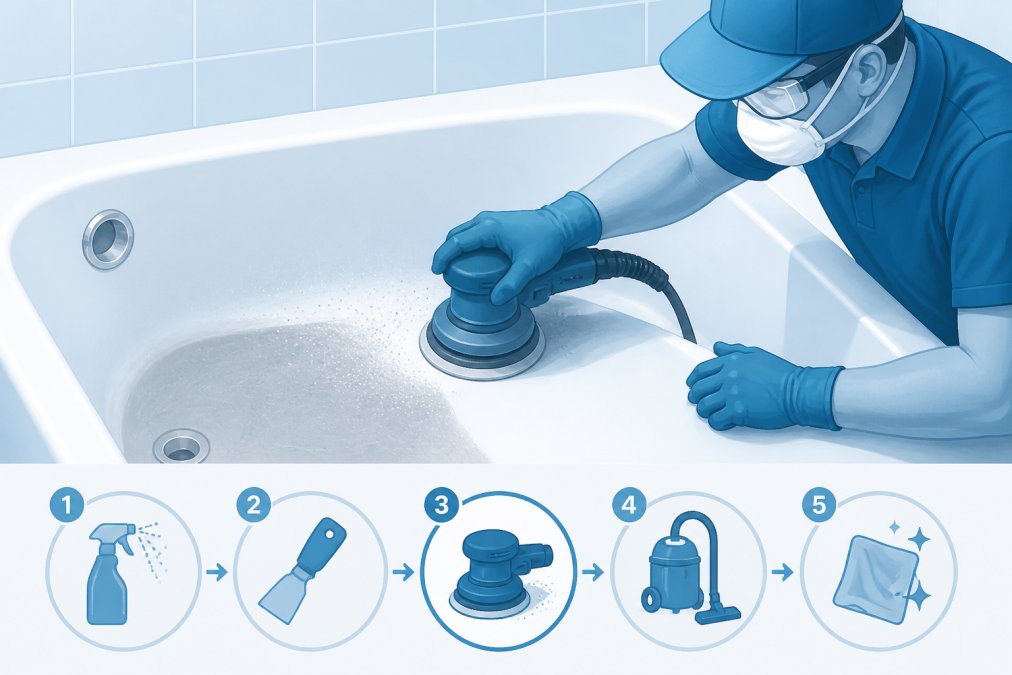
The goal is to create a surface the bonding agent and topcoat can grip. Old finishes are slick and contaminated with soap scum, hard water deposits, and mold. Even microscopic debris prevents adhesion. A bathtub refinishing process that skips this stage will show peeling within the first season.
Remove everything from the tub: soap dishes, grab bars, drain covers, and overflow plates. Drain any standing water and let the tub dry completely.
Cleaning sequence:
- Scrub the entire tub with a stiff brush and degreaser or TSP solution, paying special attention to corners and the drain area
- Rinse thoroughly with hot water multiple times until the water runs clear
- Dry completely with lint-free cloths or allow 24 hours of air drying
- Inspect for any remaining residue or discoloration
For tubs with significant mold, a hydrogen peroxide soak (spray, leave for 15 minutes, scrub, rinse) works better than bleach.
Removing Old Caulk and Hardware
Old caulk harbors mold and prevents proper sealing. Use a caulk removal tool or utility knife to cut away the old sealant, then scrape residue. For stubborn caulk, apply a caulk softener and let it sit for 15-20 minutes before scraping.
Remove drain plugs, overflow covers, and any other removable hardware. If you discover rust or corrosion underneath, clean these areas with a wire brush or fine steel wool, but don’t reinstall hardware until the coating has fully cured.
Cleaning and Degreasing
After initial scrubbing, apply a degreaser to remove oils, soap residue, or hard water deposits. TSP is standard, though commercial bathroom degreasers work as well. Mix according to package directions, apply with a sponge, let sit for 5-10 minutes, then scrub and rinse thoroughly.
Rinse at least three times with clean water, then dry with lint-free cloths. The surface should feel completely smooth and dry with no slick residue.
Repairing Chips, Cracks, and Surface Defects
Before etching and coating, address any structural damage. Small chips can be filled with two-part epoxy putty designed for tub repair. For deeper cracks in cast iron or steel, professional repair may be needed, as some cracks indicate structural issues that refinishing won’t fix.
To repair a chip, clean the damaged area thoroughly, apply epoxy putty according to product directions, smooth it level with the surrounding surface, and allow it to cure fully (typically 24 hours). Once cured, sand the repair smooth with 220-grit sandpaper.
For hairline cracks that don’t penetrate deeply, the bonding agent and topcoat may fill them adequately. However, if cracks are wider than 1/8 inch or if the tub flexes when you apply pressure, refinishing will not hold and replacement is the better option.
Cast iron tubs are more prone to deep cracks because the material is brittle. Steel tubs flex slightly, so they’re more forgiving. Acrylic and fiberglass are the most flexible but can develop stress cracks around drain areas.
Etching and Applying the Bonding Agent
Etching transforms a slick, glossy surface into something the bonding agent can grip. Most tubs have a smooth finish designed to resist adhesion; etching reverses this.
Acid etch is the standard approach. Muriatic acid (hydrochloric acid) is commonly used and available at home improvement stores. Mix according to package directions, typically a 1:1 or 1:2 ratio of acid to water. Always add acid to water, never water to acid.
Apply the etch solution with a brush or sponge, working in sections. Let it sit for 10-15 minutes. The surface will appear dull and may show slight discoloration. Rinse thoroughly with clean water multiple times until the pH of the rinse water is neutral. Dry completely.
After etching, apply the bonding agent, which is a primer that creates a chemical bridge between the old tub surface and the new topcoat. Follow the manufacturer’s instructions precisely. Most bonding agents cure in 2-4 hours before topcoat application.
You have a window of 24-48 hours after etching before the surface reoxidizes and loses its receptiveness. If you etch today and don’t apply bonding agent until next week, you’ll need to etch again.
Spraying or Rolling the Coating: Application Techniques
The topcoat must be applied evenly, without drips, runs, or uneven thickness. This is where technique separates professional results from amateur ones.
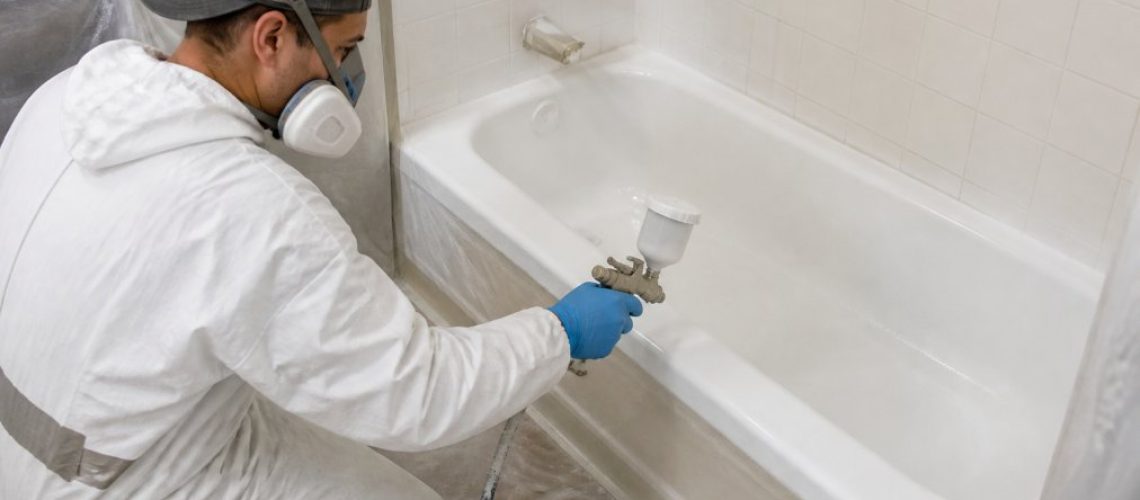
Spray application is the standard for professional work. An HVLP sprayer applies the coating in a fine, even mist that levels beautifully and dries without brush marks. Hold the spray gun 6-8 inches from the surface, moving in smooth, overlapping passes. Most topcoats require 2-3 coats, with drying time between each (typically 2-4 hours).
The first coat should be light, just enough to establish color. The second coat is heavier and does most of the work. The third coat (if required) adds depth and durability.
Roller application works for DIY projects or small areas. Use a foam roller designed for epoxy or polyurethane coatings. Roll in one direction, then back in the perpendicular direction to ensure even coverage.
Temperature and humidity matter significantly. Epoxy coatings cure best between 16-29°C with humidity below 85%. Cold, humid conditions slow curing and can cause uneven cure or a hazy finish. Maintain ventilation during application and for the full curing period.
If you’re using a spray gun for the first time, practice on cardboard or a test surface first. The technique takes a few minutes to develop muscle memory.
Curing Time and Post-Application Care
Curing is not the same as drying. A coating may feel dry to the touch in 4-6 hours, but full chemical cure takes much longer. Most epoxy topcoats require 72 hours (3 days) of curing before the tub can be used. Some products specify up to 7 days for full cure.
During curing, keep the bathroom undisturbed. Keep the door closed, avoid running the exhaust fan excessively, and don’t expose the tub to water, moisture, or physical contact.
After the full cure period, test the surface gently with a fingernail. It should be hard and not scratch easily. Reinstall drain covers, overflow plates, and any hardware you removed. Caulk the edges where the tub meets the wall using 100% silicone caulk.
Avoid abrasive scrubbing or harsh chemicals for the first month. Use mild soap and soft cloths for cleaning.
Bathtub Refinishing Cost in Canada: DIY vs. Professional
DIY costs for materials (bonding agent, topcoat, etching solution, sandpaper, safety equipment) range widely depending on product quality and tub size. Budget 8-12 hours of active work spread across multiple days, plus curing time.
The real cost of DIY is risk. Incomplete surface preparation causes peeling within months. Inadequate ventilation exposes you to VOCs. Uneven application results in an obvious amateur finish. Many DIY attempts require a professional redo, which costs more than hiring a professional initially.
Professional refinishing through services like Century BathTubs includes preparation, repair, application, and a warranty. A professional team completes the work in one day, uses commercial-grade materials, and guarantees the result. If something goes wrong, they fix it under warranty.
For property investors managing multiple units, professional refinishing scales efficiently. Century BathTubs, operating in the Toronto and GTA area since 1995, can handle multiple bathrooms across several properties, coordinating schedules to minimize disruption. The per-unit cost decreases with volume, and the three-year hassle-free guarantee provides peace of mind.
A new mid-range bathtub plus installation easily exceeds $3,000-$5,000. Refinishing costs a fraction of that, making it the economically rational choice for any tub in decent structural condition.
| Factor | DIY Refinishing | Professional Refinishing |
|---|---|---|
| Time Investment | 8-12 hours active work + 3-7 days curing | 1 day, minimal disruption |
| Material Cost | $200-$500 depending on quality | Included in service price |
| Risk of Failure | High if preparation or application is rushed | Minimal, backed by warranty |
| Warranty/Guarantee | None | Typically 3 years |
| Best For | Single tub, patient owner, low-risk scenario | Rental properties, multiple units, peace of mind |
Bathtub refinishing demands precision at every stage. The bathtub refinishing process step by step outlined here reflects professional standards that deliver lasting results. Whether you choose to DIY or hire a professional depends on your comfort with detailed preparation work, access to proper ventilation and safety equipment, and tolerance for risk.
For homeowners in Toronto and the GTA area, Century BathTubs brings 30 years of experience and a licensed, insured team to the job. Our EP-ACRYLIC coating system delivers durability that lasts, and our three-year hassle-free guarantee means you’re protected if anything goes wrong. Get a FREE INQUIRY and see how refinishing can restore your tub at a fraction of replacement cost.
Frequently Asked Questions
What is the typical cost of bathtub refinishing in Canada?
Bathtub refinishing cost in Canada varies based on tub size, condition, material, and location. Professional refinishing typically costs less than full replacement but more than basic repair kits. DIY kits are the most budget-friendly option, though results depend on application skill. For accurate pricing tailored to your project, contact a local refinishing specialist for a free quote.
How long does the bathtub refinishing process step by step actually take?
The bathtub refinishing process typically takes 1-2 days for professional application, including surface preparation, etching, coating application, and initial curing. However, full curing can take 48-72 hours before the tub is ready for heavy use. DIY projects may take longer depending on your experience. Professional teams can often complete work faster while ensuring quality standards.
How long does bathtub refinishing last, and what affects durability?
Quality bathtub refinishing can last 3-10 years or more with proper care. Durability depends on coating type (epoxy, acrylic, or liquid porcelain enamel), surface preparation quality, application technique, and maintenance. Professional-grade coatings and expert application typically outlast DIY kits. Regular gentle cleaning and avoiding abrasive scrubbers extend the lifespan significantly.
What safety precautions are most important for bathtub refinishing chemicals?
Proper ventilation is critical, open windows and use exhaust fans to manage VOCs (volatile organic compounds). Wear a respirator rated for organic vapors, chemical-resistant gloves, and eye protection. Ensure the bathroom is well-ventilated during application and curing. Never mix products, and follow manufacturer instructions carefully. If you have respiratory sensitivities, professional application is safer than DIY.
Can I use a DIY bathtub refinishing kit in Canada, or should I hire a professional?
DIY bathtub refinishing kits are available in Canada and can work for minor touch-ups or budget-conscious projects. However, professional refinishing delivers superior durability, finish quality, and warranty protection. Professionals have industrial-grade equipment, expert surface preparation skills, and proper safety protocols. For high-traffic bathrooms or cast iron tubs with deep damage, professional service is recommended.
What causes peeling or failure in bathtub refinishing, and how do I prevent it?
Common failures include inadequate surface preparation, poor etching, moisture during curing, incompatible primers or topcoats, and insufficient ventilation. Prevent peeling by thoroughly cleaning and degreasing, properly etching the surface, applying bonding agents correctly, and allowing full curing time before water exposure. Professional application minimizes these risks through proven protocols and quality materials.
Is bathtub refinishing environmentally friendly compared to replacement?
Yes, refinishing is more eco-friendly than replacement because it extends the tub's life and reduces landfill waste. However, refinishing coatings contain VOCs that require proper ventilation and safety measures. Professional services manage fumes responsibly. If environmental impact concerns you, ask refinishers about low-VOC or water-based coating options, though these may have different performance characteristics.
This article was written using GrandRanker